
A solid software product has to be intuitive, scalable, fast and reliable. Once these ABC s of the product are ensured, it s important we put some heavy load on it and bullet-proof its durability.
Enter load testing; an essential step confirming the application can support realistic load scenarios and that the code is ready for production.
So, how does the Selenium framework for load testing purposes actually work?
Think a hundred tests running in parallel on distributed machines and having a dashboard where you can play with test distribution, but also monitor application server and database server metrics, such as CPU and RAM usage or DB locks in real-time.
Quite compelling, right? Now you must be thinking: But where can I find distributed machines? If you are in the office, just look around! You ll see people staring at monitors. Let s leverage these machines together with Selenium headless feature.
This is how I set up a lab environment:
- Two virtual machines with Windows 10 installed
- One virtual machine has MS Visual Studio 2017 Enterprise installed alongside with MS Test Controller (Visual studio installation file can be downloaded here. The 90 day trial period is more than enough for testing purposes; test controller can be downloaded here. Make sure to select Controller prior to clicking Download button)
- The second machine has MS Test Agent installed. (you can download Test Agent here. Make sure to select Agent prior to clicking Download button)
- Google Chrome and Mozilla Firefox installed on both machines
A reminder: Hurry up! Visual Studio 2019 is the last version to support web performance and load testing.
Setting up Test Controller and Test Agent
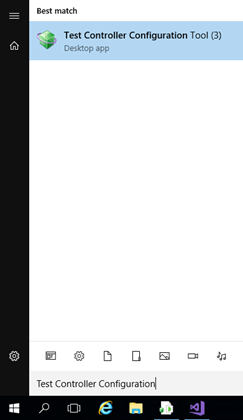
Upon installing a Test Controller on the machine, it needs to be configured. Search the machine for “Test Controller Configuration Tool”.
I configured the Test Controller as shown below:

It s important to test account credentials by clicking on the Test link on the right of the account user name field. As you can see, on my end, the test passed.
With this, we are done with Controller configuration (for now).
Next step is connecting to the agent machine (second machine) or tell a colleague to take a break and leave machine unlocked.
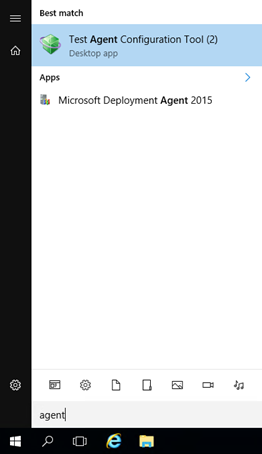
Install the Test Agent and search for it on the machine.
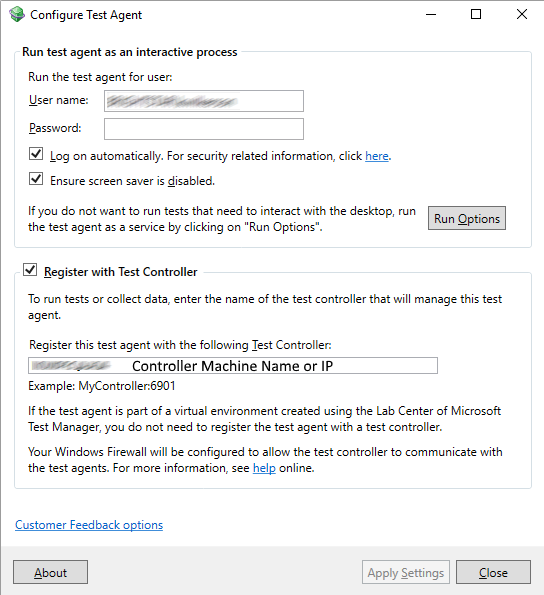
Configure Test Agent in the way to use credentials that has administrator rights on the machine. Since my two machines are on the same domain network, I can use the same credentials as for the Controller. In the “Register this Test Agent with the following Test controller” field enter the controller machine name.
Note: Test Agent and Test Controller are communicating via 6901 port. Make sure that you are able to ping Controller machine via port 6901. You can test it with Telnet or netstat command prompt command.
My Agent configuration looks as below:
Prepare a Testing framework for Web Performance testing
If your web driver is instanced as a static variable, now is the right time change it! If you leave it as static, the tests are going to interact only with the last created browser instance. My friend Ammar knows this best.
For the demo purposes, I m going to create a simple testing framework.
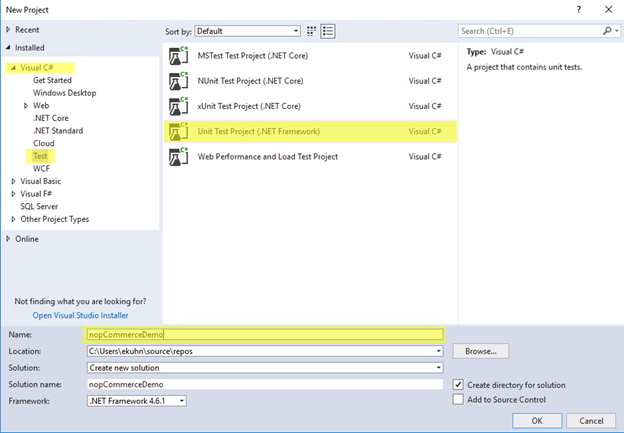
Open Visual Studio Enterprise and select File > New > Project.
Open Tools > NuGet Package Manager > Manage NuGet Packages for Solution the browser and install the following packages:
- Selenium.WebDriver
- Selenium.Chrome.Webdriver
- Selenium.Firefox.WebDriver
- DotNetSeleniumExtras.PageObjects
- System.Configuration.ConfigurationManager
- VS.QualityTools.UnitTestFramework
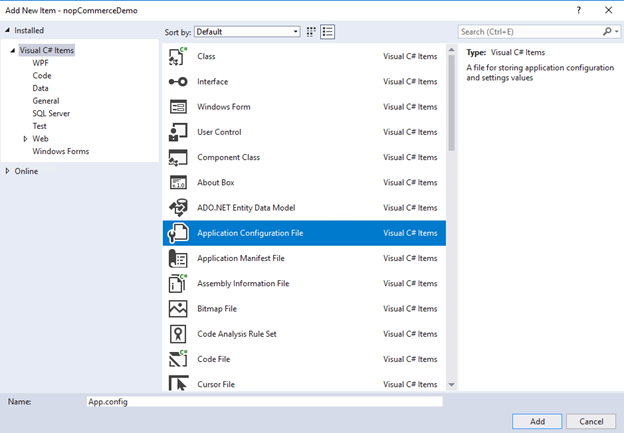
Add an App.config file to the solution as follows:
App.config file content:
<?xml version="1.0" encoding="utf-8" ?>
<configuration>
<appSettings>
<add key="url" value="https://demo.nopcommerce.com/" />
<add key="browser" value="Firefox" />
</appSettings>
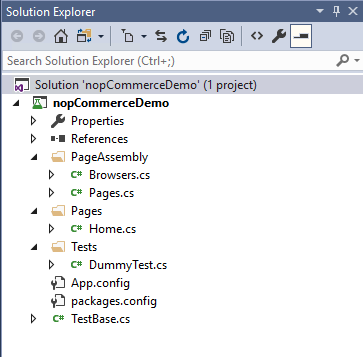
</configuration>Now, create a following project folder structure PageAssembly/Pages/Tests:
Class definitions:
Browsers.cs
using OpenQA.Selenium;
using OpenQA.Selenium.Chrome;
using OpenQA.Selenium.Firefox;
using System;
using System.Configuration;
namespace nopCommerceDemo
{
    public class Browsers
    {
        private IWebDriver webDriver;
        private static string baseURL = ConfigurationManager.AppSettings["url"];
        private static string browser = ConfigurationManager.AppSettings["browser"];
        public void Init()
        {
            switch (browser)
            {
                case "Chrome":
                    webDriver = new ChromeDriver();
                    break;
                case "Firefox":
                    webDriver = new FirefoxDriver(Environment.CurrentDirectory);
                    break;
                default:
                    webDriver = new ChromeDriver();
                    break;
            }
            webDriver.Manage().Window.Maximize();
            Goto(baseURL);
        }
        public string Title
        {
            get { return webDriver.Title; }
        }
        public IWebDriver getDriver
        {
            get { return webDriver; }
        }
        public void Goto(string url)
        {
            webDriver.Url = url;
        }
        public void Close()
        {
            webDriver.Quit();
        }
    }
}
Pages.cs
using SeleniumExtras.PageObjects;
namespace nopCommerceDemo
{
    public class Pages
    {
        public Pages(Browsers browser)
        {
            _browser = browser;
        }
        Browsers _browser;
private T GetPages<T>() where T : new()
        {
            var page = new T();
            PageFactory.InitElements(_browser.getDriver, page);
            return page;
        }
        public Home home
        {
            get { return GetPages<Home>(); }
        }
    }
}
Home.cs
using Microsoft.VisualStudio.TestTools.UnitTesting;
using OpenQA.Selenium;
using SeleniumExtras.PageObjects;
namespace nopCommerceDemo
{
    public class Home
    {
        public Home()
        {
            driver = null;
        }
        public Home(IWebDriver webDriver)
        {
            driver = webDriver;
        }
//Driver
        IWebDriver driver;
//Locators
        [FindsBy(How = How.Id, Using = "small-searchterms")]
        IWebElement SearchField;
[FindsBy(How = How.XPath, Using = "//input[@value='Search']")]
        IWebElement SearchButton;
//Actions
        public Home isAt()
        {
            Assert.IsTrue(driver.Title.Equals("nopCommerce demo store"));
            return this;
        }
        public Home EnterSearchText(string searchText)
        {
            SearchField.SendKeys(searchText);
            return this;
        }
        public Home ClickSearch()
        {
            SearchButton.Click();
            return this;
        }
    }
}
DummyTest.cs
using Microsoft.VisualStudio.TestTools.UnitTesting;
namespace nopCommerceDemo
{
    [TestClass]
    public class DummyTest : TestBase
    {
        [TestMethod]
        public void OpenAndSearchText()
        {
            _pages.home.EnterSearchText("Test");
            _pages.home.ClickSearch();
        }
    }
}
TestBase.cs
using Microsoft.VisualStudio.TestTools.UnitTesting;
namespace nopCommerceDemo
{
[TestClass]
public abstract class TestBase
{
protected Browsers _browser;
protected Pages _pages;
[TestInitialize]
public void startUpTest()
{
_browser = new Browsers();
_browser.Init();
_pages = new Pages(_browser);
}
[TestCleanup]
public void endTest()
{
_browser.Close();
}
}
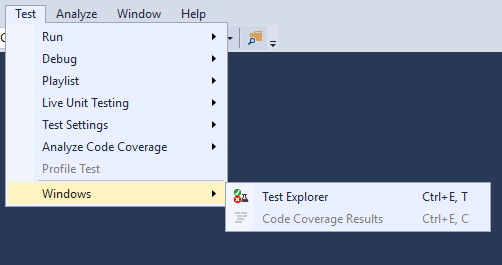
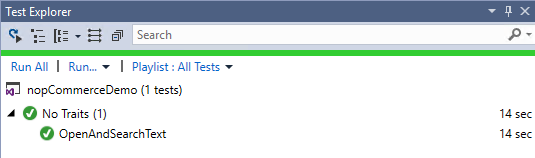
}Bring up the Test Explorer window, build the solution and then run the test.
Note: If you are missing Test Explorer window, find it under the Test > Windows.
Create a distributed web performance test
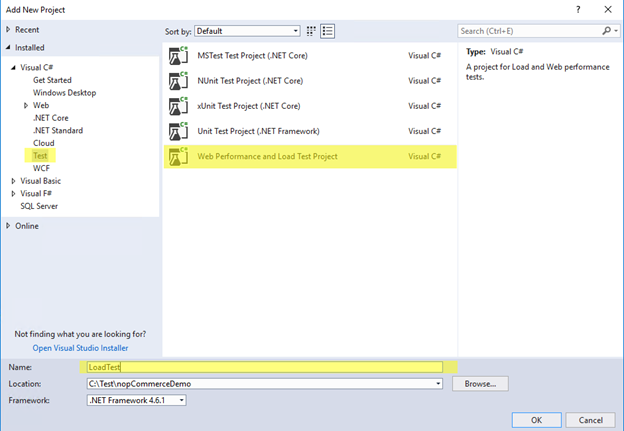
In order to create a distributed web performance test, right-click the mouse and select Add > New Project.

Once Add New Project window is shown, select Web Performance and Load Test Project, type in the project name and click on the OK button.
Note: If you don t already have the web performance and load testing tools component installed, you ll need to install it through the Visual Studio Installer.
Open Visual Studio Installer from the Start menu of Windows. You can also access it in Visual Studio from the new project dialog box or by choosing Tools > Get Tools and Features from the menu bar.
In Visual Studio Installer, choose the Individual components tab, and scroll down to the Debugging and testing section. Select Web Performance and load testing tools.
The new solution structure is going to look as shown below:
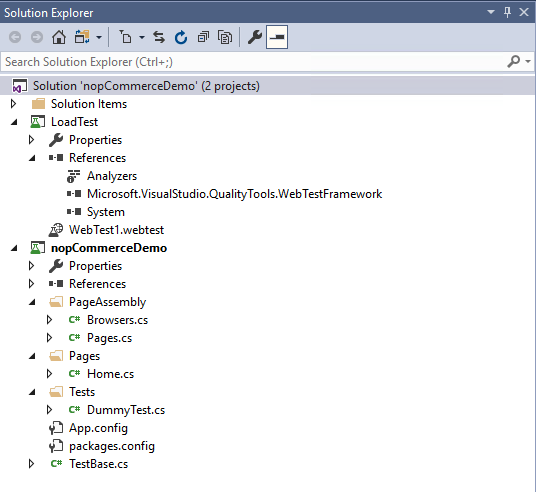
Make sure to add a reference to the Selenium framework in order to see the tests in the load testing project. You can add the reference with right-clicking on the References node and selecting Add Reference.
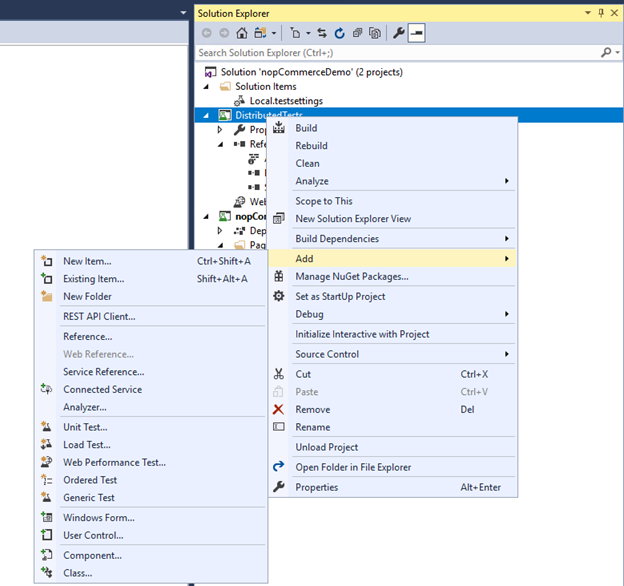
Now it s time to create a load testing plan! Right-click on the load test project name and select Add > Load Test.
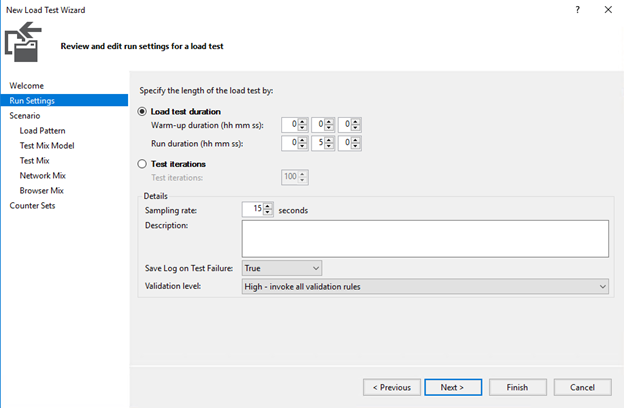
Complete the wizard as shown below:
- Step 1
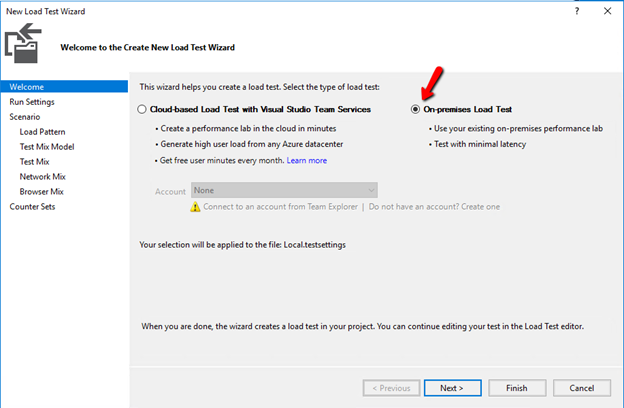
- Step 2

- Step 3
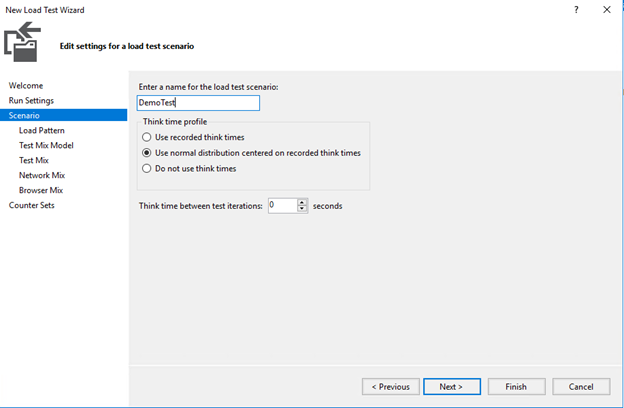
- Step 4

- Step 5

- Step 6
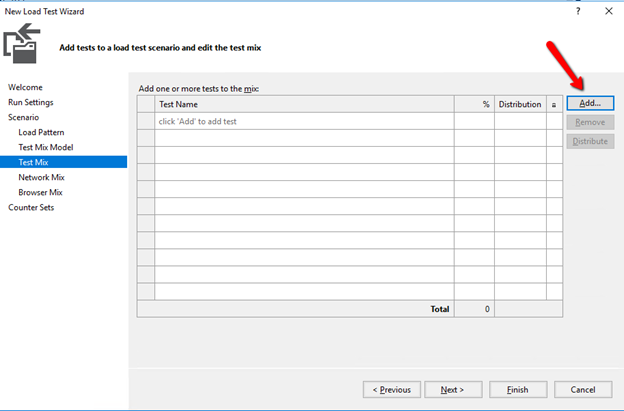
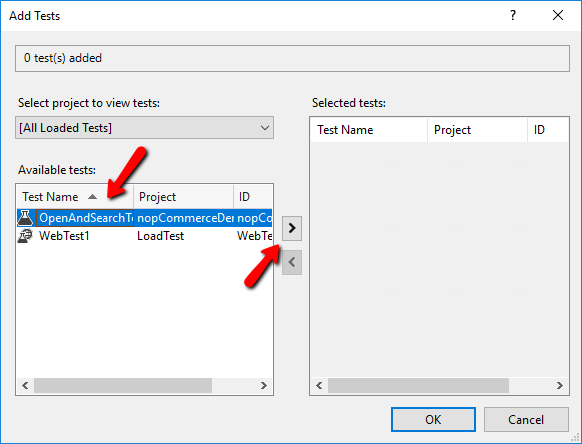
- Step 7

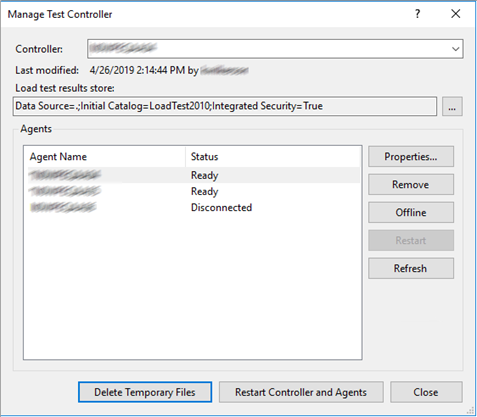
Set up configurations for a remote test run
In order to distribute tests across the system, we need to set up test settings. Open the Load Test > Manage Test Controllers Our agent should have Ready status.
Notice that on my end controller machine is also an agent due to the fact that I installed an agent and controller on the same machine.
Under the solution, we have a Local.testsettings file stored in the Solution Items folder. That file is a configuration for test runs on a local machine. In order to distribute tests, we need to create a new file named Remote.testsettings.

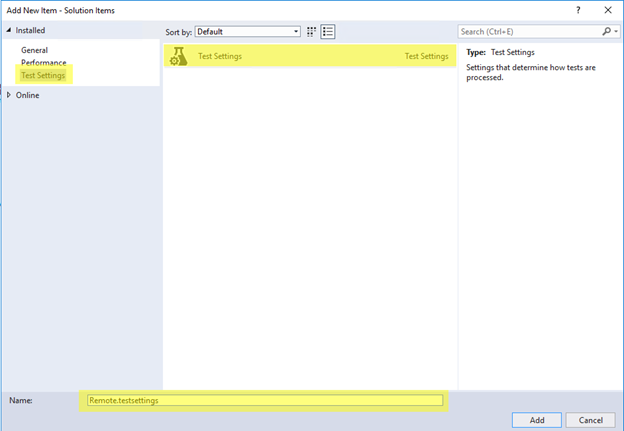
Right click on the solution name and select Add > New Item. Once Add New Item window is shown, select Test Settings and give it name Remote.testsettings as shown below:
Complete the wizard as follows:
- Step 1
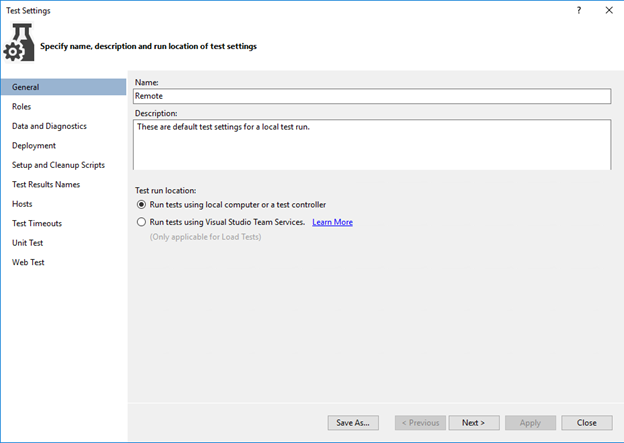
- Step 2
Click Apply and then Close.
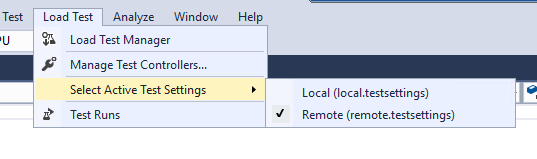
Select the new Remote settings from the Load Test menu as follows:
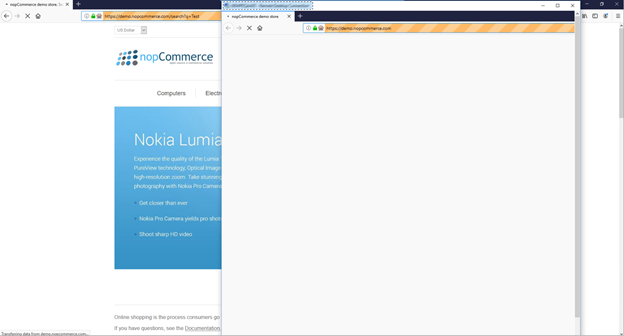
Now you should be ready for a test run. As you can see in the screenshot below my controller machine (full screen) and agent machine on the right (with blue windows wallpaper).
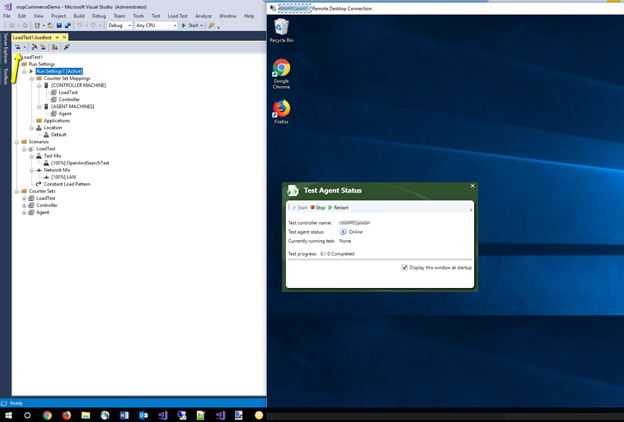
Click on the icon as shown in the screenshot above and observe!
Next steps
Your next steps are to make the tests run in headless mode and also playing with all possible Test Run Settings and Load patterns.
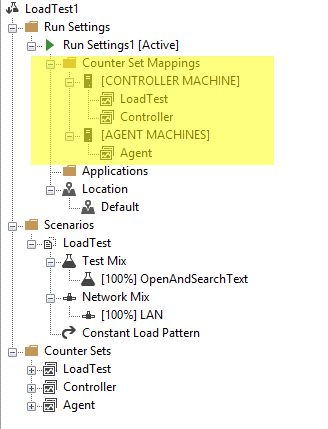
Don t forget, all test metrics are fully configurable under the Counter Set Mappings node.
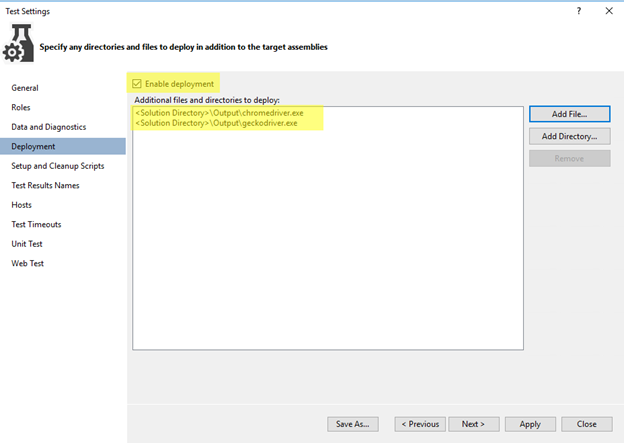
Note: If your test cases are failing with “My steps are failing with OpenQA.Selenium.DriverServiceNotFoundException” message, you will need to make a unique output folder for both projects. Right click on the project name and select Properties. (Do this for load testing and framework projects)

Then, double click on Remote.test settings, select Deployment tab and look for chrome and firefox drivers.
That s it! We are looking forward to hearing any questions or comments you may have.