
Working as a Quality Assurance Engineer means that you can expect a last-minute testing request at any moment. Recently, I received just such a request to test an app’s responsiveness with a constant load of several thousand concurrent users. There was no need to capture metrics, create fancy graphs, or anything like that, but rather to examine if we can use the app while it is under a constant load. I had to act quickly. The very first tool that crossed my mind was the old faithful Apache JMeter. It is a functional open-source application with a lot of plugins and a simple interface for creating and running load tests. However, without a JMeter distributed testing feature set in place, testing on a single machine would be mission impossible. Once again, I resorted to my Google search skills determined to find a quick, clean solution.
Out of nowhere, a simple open-source load testing tool caught my attention — k6.
K6: Create tests faster with our test builder, recorder, or converters (JMeter, Postman, Swagger).
I was truly shocked at this chance to once again use my super-fancy-do-it-all-with-a-single-click Postman collection!
How to make it happen?
First, check if node.js is installed on the machine. Open the command prompt and type in node –v. You should get info about the installed version here.
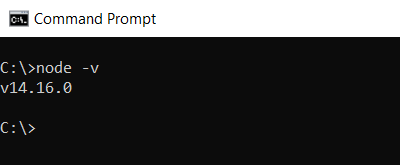
Note: In case, you get the unknown command message, please install the node from https://nodejs.org/en/
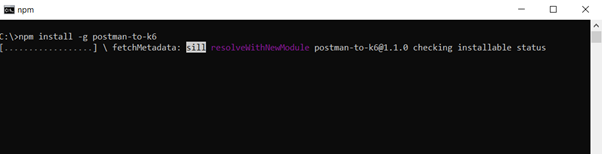
Step 1: Install the postman-to-k6 tool
The postman-to-k6 tool helps to convert your Postman collection to k6 JavaScript code. Install it by typing the below command into the terminal.
npm install -g postman-to-k6
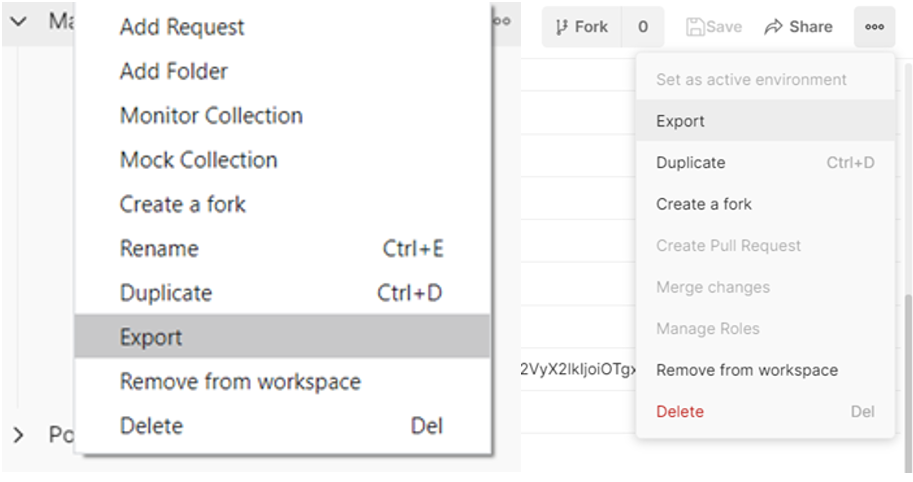
Step 2: Export your Postman collection end environment variables
To convert the Postman collection, export it as well as any variables (if they exist).
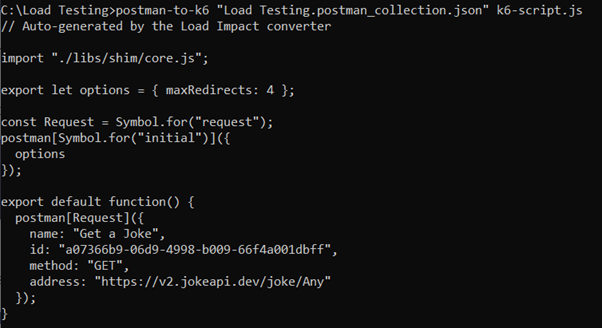
Step 3: Convert your exported Postman collection to k6 script
Assuming that the exported collection is named “test-api.json” and the environment variables “env.json”, run the following command to convert it to a k6 script.
postman-to-k6 test-api.json -e env.json -o k6-script.js
Should you want to do some fine-tuning of your tests, like adding data or changing environment variables inside your code, please refer to the official documentation: postman-to-k6 README.
Step 4: Install k6 and do a test run
K6 tool supports various platforms, including Windows, Linux, macOS, and docker. To install it, just follow the instructions for your system. For a Windows user like myself, installation is super easy — download, next, next, and finish.
After k6 installation, open the auto-generated script in your favorite code editor (my personal pick is Visual Studio Code), bring up a terminal window, run the command below, and check the results.
K6 run k6-script.js
Something went wrong, what now?

After reviewing the results, it was clear that something wasn’t quite right. A deeper analysis showed that, in most cases, we cannot simply convert a Postman script and run it as-is. The majority of super-cool features that are used in the Postman collection are not supported in k6. Before running the k6 script, dynamic variables and most functions from pre-test and post-test scripts require maintenance or perhaps creation from scratch. Fortunately, there is a way to change the auto-generated k6 script and make magic happen, but with over a thousand lines of auto-generated code on my end, that could take days.
Have I hit a snag?
As I hit a turning point, I needed to decide whether to move on with k6 or go back to the good-old Apache JMeter distributed test setup. I chose to give k6 one more shot because it seems to be a useful piece of software.
Build a k6 load testing script from scratch
Open up Visual Studio Code and add a new JavaScript file with content in the content below.
Note: using https://dummy.restapiexample.com/ as demo API.
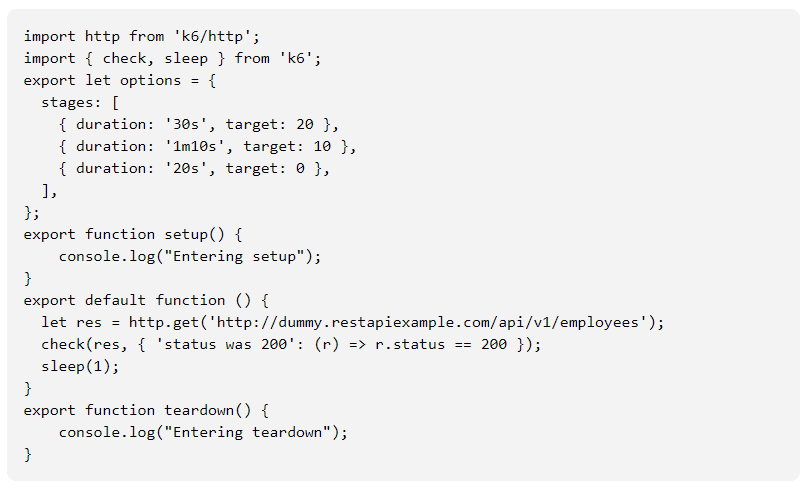
Test architecture is simple. It has four main modules:
- Initialization: Code written outside of the setup(), default function(), and teardown() methods is referred to as initialization. It’s used to set up the tests. The test scenarios, global variables like endpoint address, and everything else on the global level is specified in the “init” module.
- Setup: The setup module is utilized as a one-time test setup, and the code within will only run once at the start of the test. A basic create a user or produce data method is an excellent choice for this module.
- Teardown: The teardown module, like setup, will only execute once — at the end of the test. All functions that clean up our testing, such as delete user, remove user data, and so on, are candidates for this method.
- The VU (virtual user) module contains all of the code that is written inside the default function() module. It is the heart of every test, and depending on the init module, the code therein is executed several times. In a nutshell, the VU module is a load test.
Sending API requests and verifying responses
In the previous sample, I managed to send a GET request and verify the response’s HTTP code. Usually, verifying an HTTP code is not enough. The response body also needs to be verified. Furthermore, there could be a situation that requires reuse of a part of response JSON as a request body in the next request.
Let’s go back to our simple k6 file. Add the following lines within the default function() method:
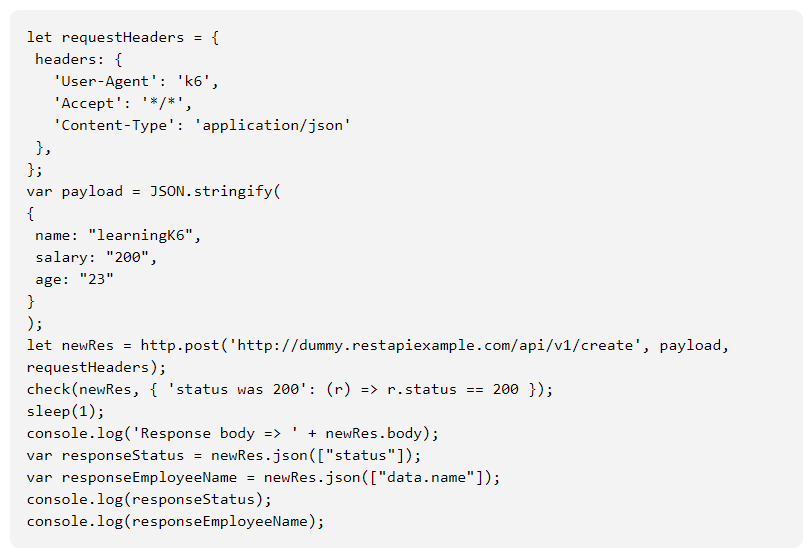
Looking closer, you will notice that at the beginning two new JSONs were created:
- requestHeader is a simple request header
- payload is a request body. As per API documentation, that’s how it should appear
After that, send a request and write a response to the console.
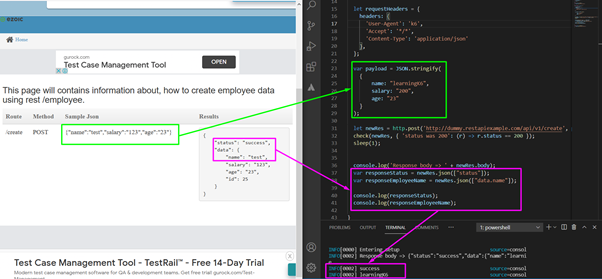
If you followed the instructions carefully, you’ve got it! As demonstrated in the screenshot above, we managed to send a POST request and fetch data from the response JSON. We simply wrote the data to the console in this example. However, we can save the data and utilize it in the next request.
Checks and Thresholds
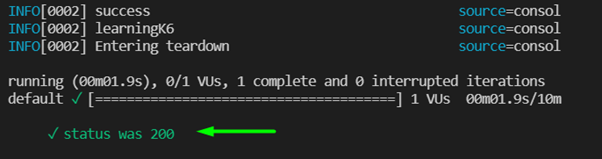
At the beginning of our load testing journey, a “check” was added that verifies the HTTP response code.
check(newRes, { 'status was 200': (r) => r.status == 200 });
Checks are nothing but simple assertions. Interestingly, a check does not fail the test, but simply gives information on the output. The screenshot below shows what happened in this case.
Thresholds are used to fail the test if, for example, the request takes longer than expected to respond or produces an unexpected HTTP code.
Thresholds are set in the init module of the test, and they are used to determine the final test output. For this simple load test, I will not be setting any thresholds. As needed, detailed threshold documentation can be found here.
At the end of the day, checks and thresholds can provide us with information when something goes wrong, but I don’t believe they will be of much use here. The best option would be to work together with an infrastructure team and use their monitoring tools. In that case, you can provide a load and they can tell you all about server performance, memory usage, database locks, etc.
Clash of the titans
Is k6 the best tool ever? Who can benefit from it? If I prefer other tools, would you think I’m old-fashioned?
Those are difficult questions to answer, and the answers typically depend on the scenario you’re in. Any load testing tool is a good one if it suits your needs. In my case, I found the k6 tool handy since it does not require a supercharged machine, its documentation is awesome, and it simply works well.
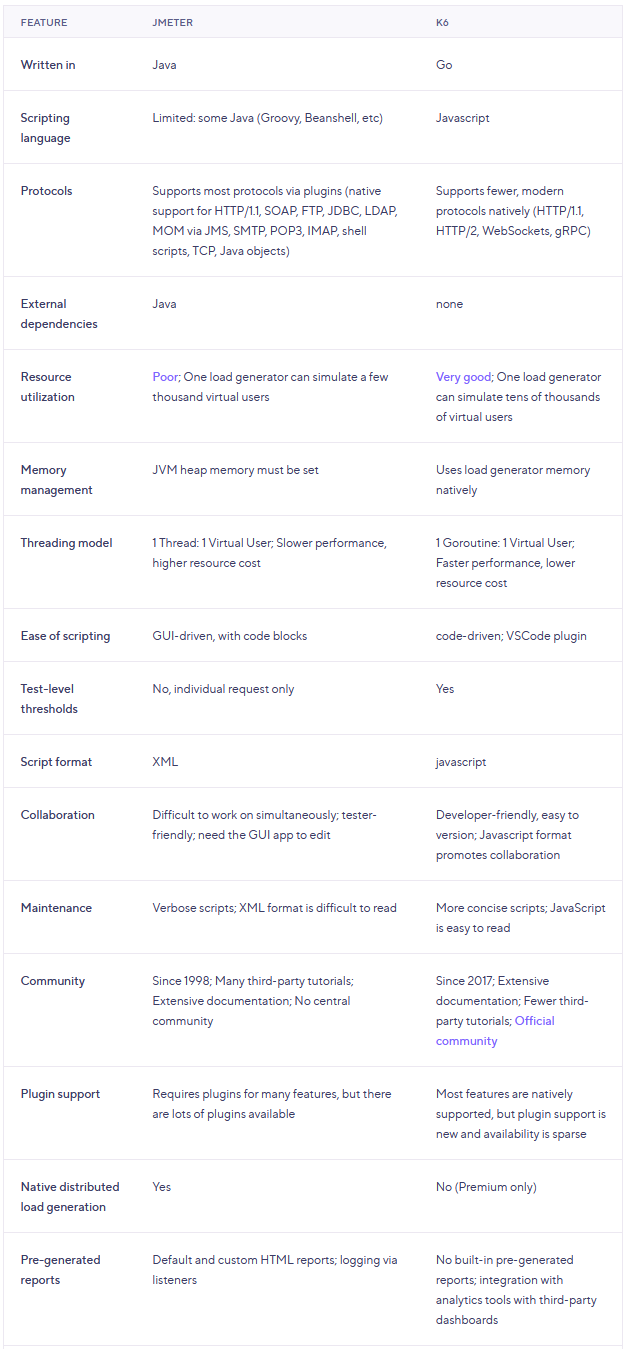
The table below shows a side-by-side comparison between k6 and Apache JMeter.
Finding a solution to a problem seems a simple task, as long as you have the right tools. In my case, I chose k6 over JMeter because I wanted to test with tens of thousands of concurrent users and didn’t need a fancy html output.
Finally, the fact that there are dozens of high-powered load testing tools on the market is the best of all. All we have to do now is choose which one to use.
Until next time. Happy (load) testing!