
Introduction
Most of you probably heard that more and more people are using Microsoft.NET Core technology.
.NET Core was created as an open source, cross-platform so it can be used in more resource-constrained environments. So far, Selenium projects could only be run on a Windows machine, but now with the .NET core, we are able to run it across platforms.
In this article, I m going to show you how to migrate a Selenium project from .NET framework to .NET core.
Selenium WebDriver + .NET Framework
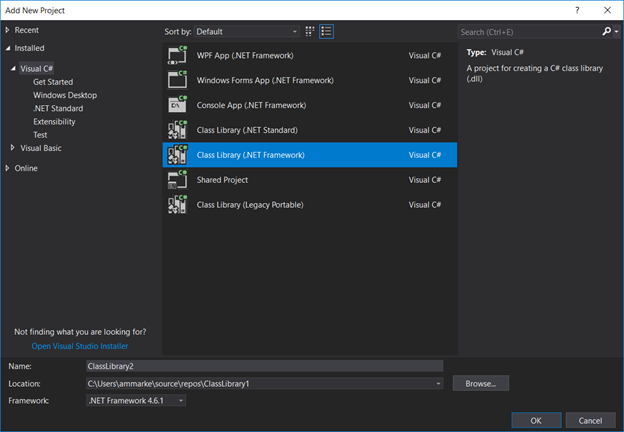
If you use Visual Studio 2017 15.* and try to create .NET Framework library, the .NET Framework 4.6.* is chosen by default.
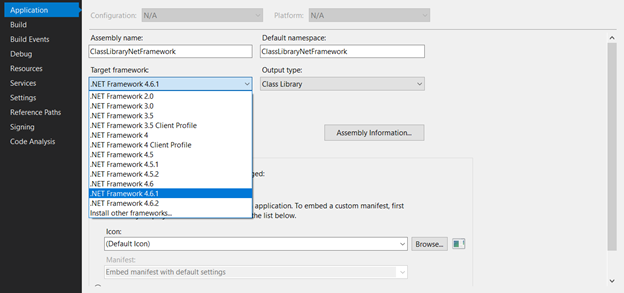
When you are ready, create a new .NET Framework class library and open the project s properties. We need to check that the target framework is .NET Framework 4.6.1 or any higher version.
The first step would be to add the most known web drivers – Chrome and Firefox through NuGet package manager. We will also need to install a couple of NuGets packages to do that.
This is how you add the two drivers, Chrome and Firefox:
After we added the Selenium Chrome and Firefox driver packages we need to add Selenium WebDriver API to communicate with the browser and Selenium support package which contains classes to support web driver actions.
Now, we need to install NUnit and NUnit3TestAdapter NuGets to support our testing. Instead of NUnit framework, you can use MSTest framework or xUnit Framework.
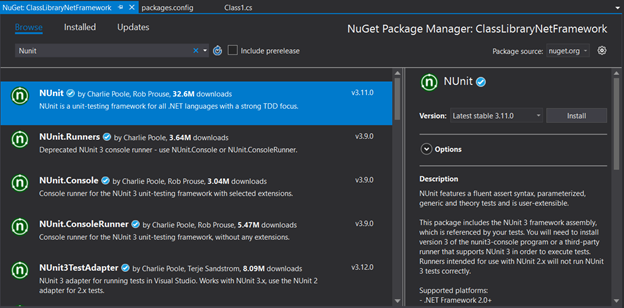
You can find all the NuGet packages in the packages.config project file.

We are ready to create a demo test with Selenium and .NET Framework for both browsers. Let s open the default class in the project and add [TestFixture] above the class definition to mark this class as a test class.

Now we ll create tests for both drivers; open a new instance of the web driver and open the browser with a specific URL. When you re done, close the web browser and driver instance (very simple tests).
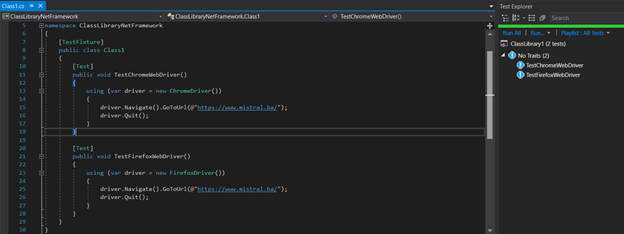
These are the minimum steps on how to create a test with Selenium and .NET Framework. To create an advanced framework we need to use page object modeling architecture, but this article is not about that.
Our focus is on the migration of more simple elements to .NET Core.
Selenium WebDriver + .NET Core
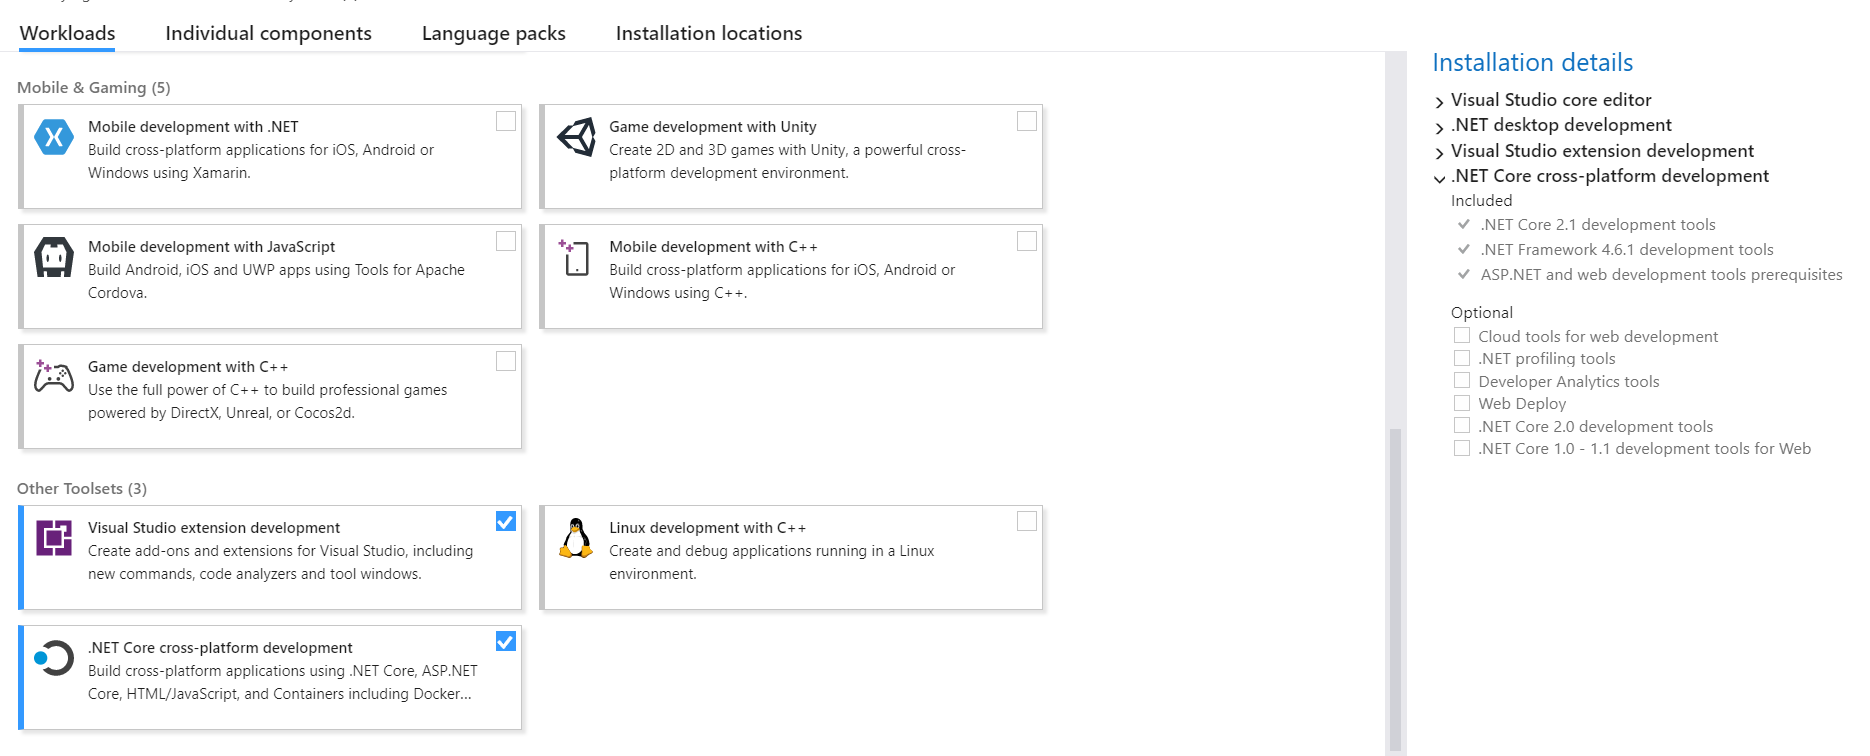
To use .NET Core, first of all, you need to have .NET Core SDK installed. You can download it here. If you use Visual Studio 2017 15.* you need to have the .NET Core cross-platform development tool-set installed.
Now we can start with the migration of our Selenium project from .NET Framework to .NET Core. When you install the .NET Core SDK 2.* open visual studio, create a new class library project (.NET Core)
After creating a new class library project we need to open the project s properties and check the “Target framework”. It should be .NET Core 2.2.

We are now ready to start adding the same NuGet packages as we did for the .NET Framework. This means that you will be able to combine your .NET Core project with .NET Framework NuGets that don’t have .NET Core support. This is the case of Selenium.WebDriver. One of the new features of the .NET Core tooling is that the package.config is gone and all packages are referenced directly in the project s MSBuild file.
Finally, we need one more NuGet package so we can execute tests from the .NET Core class library Microsoft.NET.Test.Sdk.
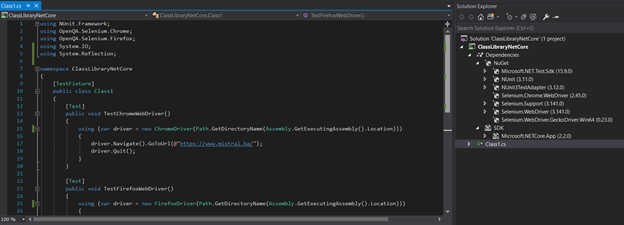
When we try to run tests for Chrome and Firefox we will see the following error: The chromedriver.exe file does not exist in the current directory or in a directory on the PATH environment variable.
This happens because the NuGet packages for .NET Core projects are loaded from a global place instead of the packages folder of the .NET Framework projects. To resolve it, we need to specify the path to the execution folder. (Path.GetDirectoryName(Assembly.GetExecutingAssembly().Location))
You can run framework tests from the Test Explorer window. However, if you have installed the .NET Core command line tools, you can run all of your tests from the command line as well. You can find more about the dotnet test command in the official documentation.
We hope you find this migration guide useful. We d love to hear about your experiences on the topic, so feel free to share in the comments below!