
A Very Short History Lesson
The QA role in a scrum team has changed considerably over the last decade.
In the beginning, we were mostly using several testing tools and did everything manually testing a product, or an enhancement, and signing it off. Then, some fancy automation tools entered the Testing sphere, including QTP, Selenium, and MS CodedUI. At that moment, we felt like champions, superheroes even.
However, with every new step we made, product managers expectations were rising. Today, we re dealing with complex web applications where we often need to work with third-party integration APIs.
Why do we need 3rd party integration APIs?
Let s say you are working on a food delivery web app. Naturally, you will have some sort of Food Chart there (where your order will be stored) and an Order Button. When that button is clicked, and the order goes to the restaurant, you are “stuck” because the logged user has nothing to do with it anymore. In order to complete E2E test, you need to pretend to be “the restaurant” (third party vendor) and confirm the order, cook it and send it to the user.
How we do it? There are two ways:
- Manual QA way: Select order, click on the Order Button, use API tool to send an API request (such as Postman or SoapUI) and complete the Order.
- Automation QA way: Use an automation testing tool (such as Selenium WebDriver) to select the Order and click on the Order button, API package to send the API requests, and then complete the order with an automation testing tool.
RestSharp + C# = ÔØñ
Demo Time
For the demo purpose, let s use an exposed sample jokeAPI the RESTful API that serves uniformly, and well-formatted jokes.
We will send and validate simple HTTP GET info in order to receive JSON object and validate the request-response code.
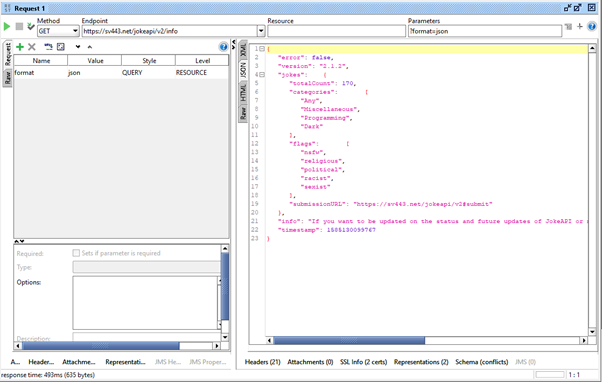
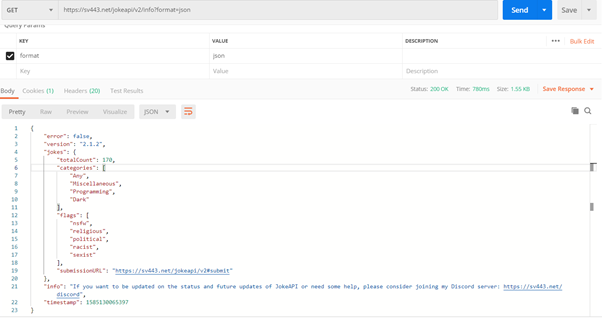
Request sent via SoapUI and Postman:
Build the framework from scratch
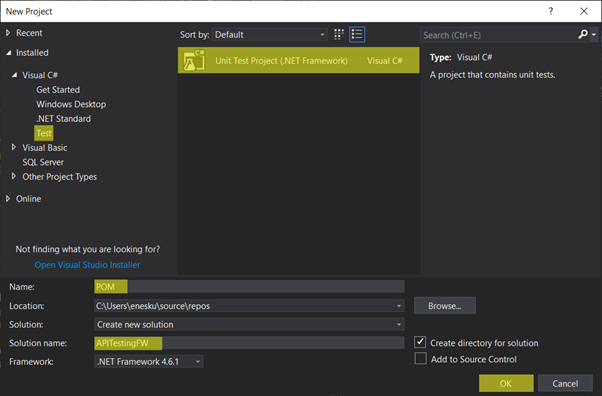
Open Visual Studio and create a new Unit Test Project.
Install all necessary NuGet packages:
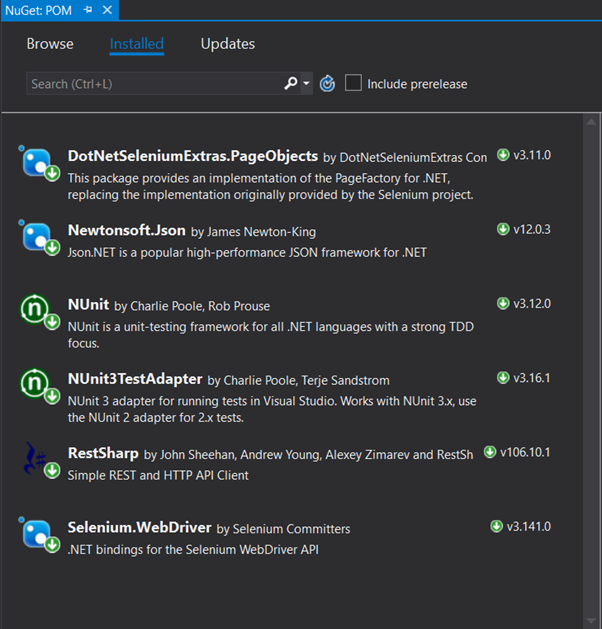
The most important thing over here is the RestSharp NuGet.
RestSharp is a C# based library that is used to test RESTful Web Services. This library behaves like a headless Client to access REST web services. We can create highly customizable HTTP Requests to send to the Restful server. This enables us to test a wide variety of Request combinations and in turn test different combinations of core business logic.
Build the project structure as shown in the picture below:
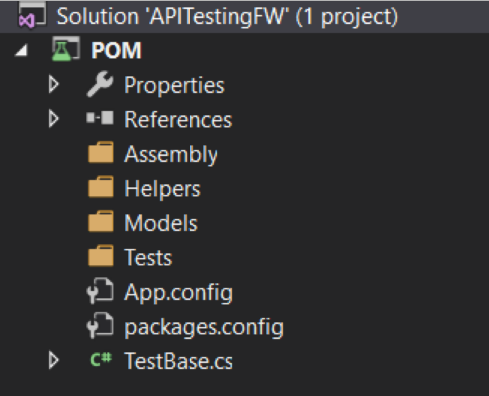
- Assembly: Similar to POM page assembly class responsible for creating page instances and getting instances respectively
- Helpers: Folder for helper and wrapper classes
- Models: Similar to POM page models class we are going to put API resources there
- Tests: Folder for test classes
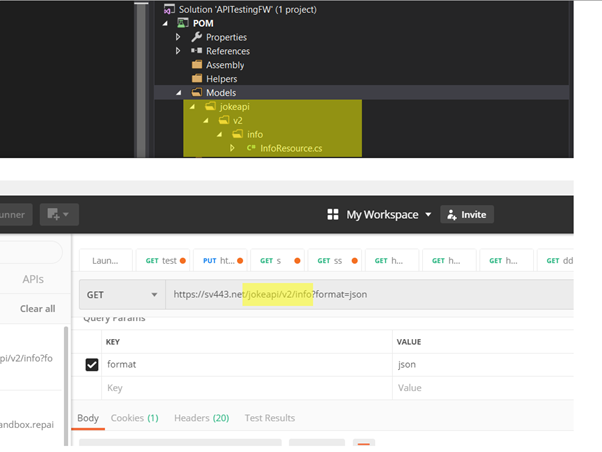
Within the Models folder, create a folder structure to match service endpoint (see the screenshot below).

InfoResource.cs
using Newtonsoft.Json;
using NUnit.Framework;
using RestSharp;
using System;
using System.Net;
namespace API
{
    public class InfoResource
    {
        private static RestClient RestClient { get; set; }
        private static IRestResponse Reponse { get; set; }
        private static RestRequest RestRequest { get; set; }
private void InitialiseEndpoint()
        {
            RestClient = new RestClient();
            RestRequest = new RestRequest("jokeapi/v2/info/", Method.GET);
        }
private void AddEndpoint()
        {
            var endpointUri = new Uri("https://sv443.net/");
            RestClient.BaseUrl = endpointUri;
        }
private void SendGetInfoRequest()
        {
            Reponse = RestClient.Execute(RestRequest);
            Console.WriteLine(JsonConvert.SerializeObject(Reponse.Content, Formatting.Indented));
        }
private void ValidateResponse()
        {
            Assert.AreEqual(HttpStatusCode.OK, Reponse.StatusCode);
        }
public void SendRequestAndValidateResponse()
        {
            InitialiseEndpoint();
            AddEndpoint();
            SendGetInfoRequest();
            ValidateResponse();
        }
    }
}
The SendRequestAndValidateResponse method is the test method responsible for creating, sending and validating the response.
Resources Assembly
For the resources assembly, we are going to use the Page Factory POM concept. This is an important step since the framework needs to be created in a way that smoothly works with the Selenium Web Driver testing framework. By doing that, we will simply pass a resource the same way we do for pages.
Create a new class within Resources.cs within the Assembly folder with class definition as follows:
using System;
namespace API
{
    public class Resources
    {
        public static T GetResource<T>() where T : class
        {
            var page = (T)Activator.CreateInstance(typeof(T));
            return page;
        }
public InfoResource InfoResource => GetResource<InfoResource>();
    }
}
Note: If you are adding the API module in your Selenium Web Driver framework, you will partially skip this step because you already have Pages.cs class, so you can just add a new getter method for the new resource. On the other hand, you can rename it to PagesAndResources.cs.
TestBase and Test classes
TestBase and Test classes are not going to be impacted at all. On my end, with no Selenium Web Driver tests, those are looking as follows:

//TestBase.cs
using API;
using NUnit.Framework;
namespace Test
{
    [TestFixture]
    public abstract class TestBase
    {
        protected Resources resources;
[SetUp]
        public void StartUpTest()
        {
            resources = new Resources();
        }
[TearDown]
        public void EndTest()
        {
            // kill webdriver instaces
        }
    }
}
//Test.cs
using NUnit.Framework;
namespace Test
{
    [TestFixture]
    public class DummyTest : TestBase
    {
        [Test]
        public void Test()
        {
            resources.InfoResource.SendRequestAndValidateResponse();
        }
    }
}
Run the test and observe the results!
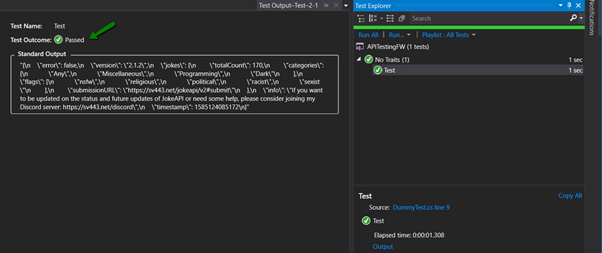
We did it! Our assertion passed!
We expected 200 OK response and got it.
Assert.AreEqual(HttpStatusCode.OK, Reponse.StatusCode);You can now continue using the framework independently or include it in the existing Selenium Web Driver testing framework.
Till the next time Happy testing!