
You are probably familiar with the term static code analysis, especially if you have a few years of experience under your belt.
And if you re just getting started, let s go to the beginning:
Why is it so important?
Static analysis allows us to identify potential bugs, code smells and security vulnerability even before our code goes into the production environment.
It allows us to fully enforce code quality practices across multiple teams and prevent possible errors that might occur after the release.
Static analysis is an essential part of the product development process.
There are a lot of tools that can be leveraged for this purpose today. Some of the most popular and widely used tools are Veracode and SonarQube. You can check out the pros and cons, as well as user reviews for both tools here and decide which option better suits your needs.
In this blog, we ll explain how to set up SonarQube for .Net projects in Microsoft Windows environment.
Basic configuration
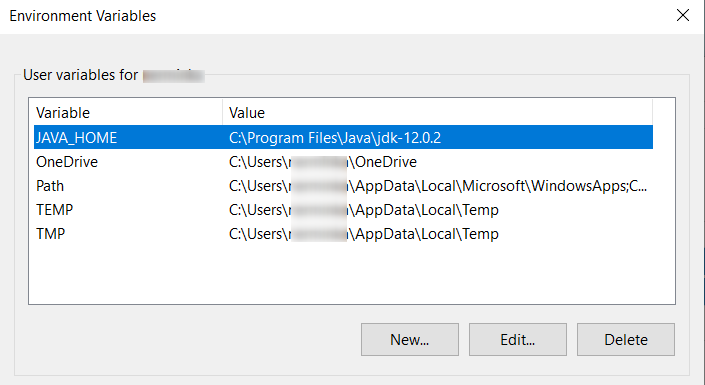
As Java run-time is the main prerequisite, the first thing we need to do is to download and install a Java Development Kit (JDK).
You can run the JDK without setting the JAVA_PATH environment variable, or you can optionally set it so that you can conveniently run the JDK executable files (javac.exe, java.exe, javadoc.exe) from any directory without having to type the full path of the command. If you do not set the JAVA_PATH variable, you need to specify the full path to the executable file every time you run it. If you are always looking for ways to make your workflow more efficient, let s choose a more practical way so you don t have to this every time.
Next step is to downloadSonarQube server and extract it to a specified location e.g. C:\sonarqube.
After this, navigate to the “conf” sub-folder and enter a path to java executable in a wrapper.conf file

Now the only thing left is to run sonar server from the following path:
C:\sonarqube\bin\windows-x86 64

If everything goes well, you should get a message that the Sonar server is up and running:

Now, if you open http://localhost:9000/ address you ll see the home screen from which you can log in and start exploring!
Although you ll have a fully functional static analysis tool at this point, keep in mind that SonarQube uses an embedded database. What does this mean?
An embedded database is used for evaluation purposes only. The embedded database will not scale, it will not support upgrading to newer versions of SonarQube, and there is no support for migrating your data out of it into a different database engine.
Having this in mind, let s avoid the above-mentioned limitation and make our sonar more maintainable!
Setting up the database
In order to avoid possible future roadblocks, we need to set up a database. We ll use MSSQL. If you don t have it installed already, you can check the official site anddownload the edition that meets your needs.
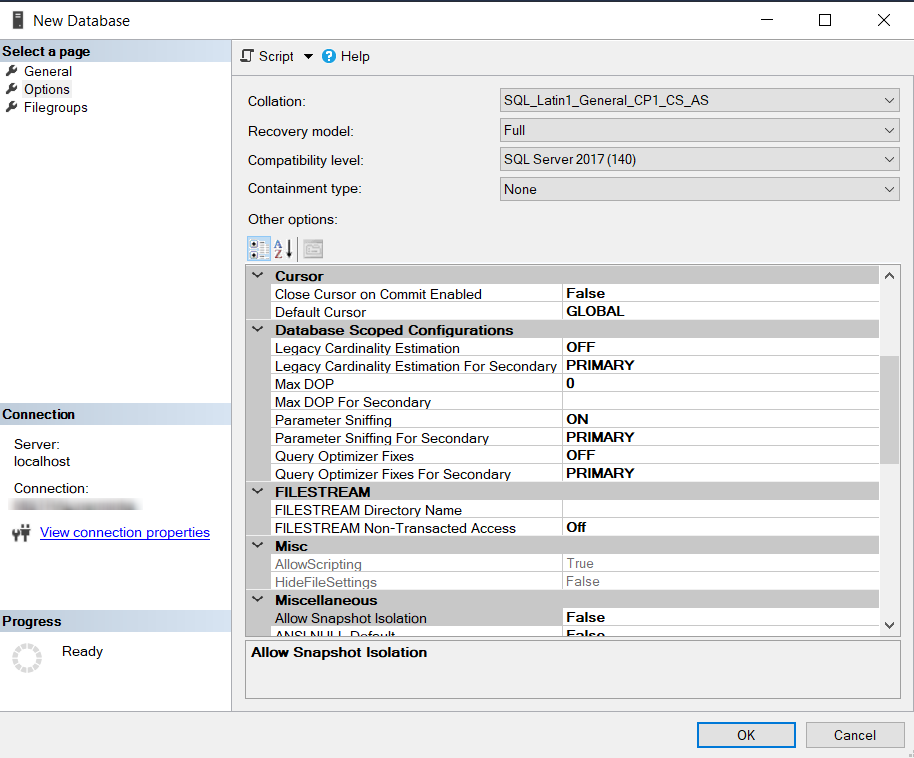
After successful installation, the first thing we need to do is create our database and set a proper collation:
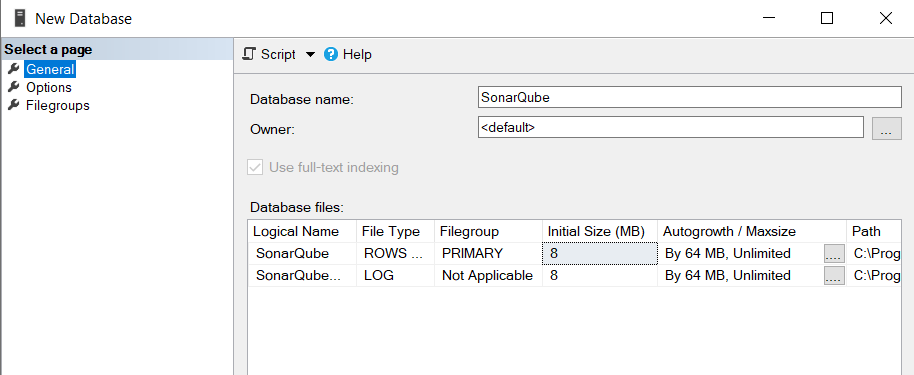
Don t forget: Collation MUST be case-sensitive (CS) and accent-sensitive (AS)
After the database has been successfully created, we need to create server login and a user:


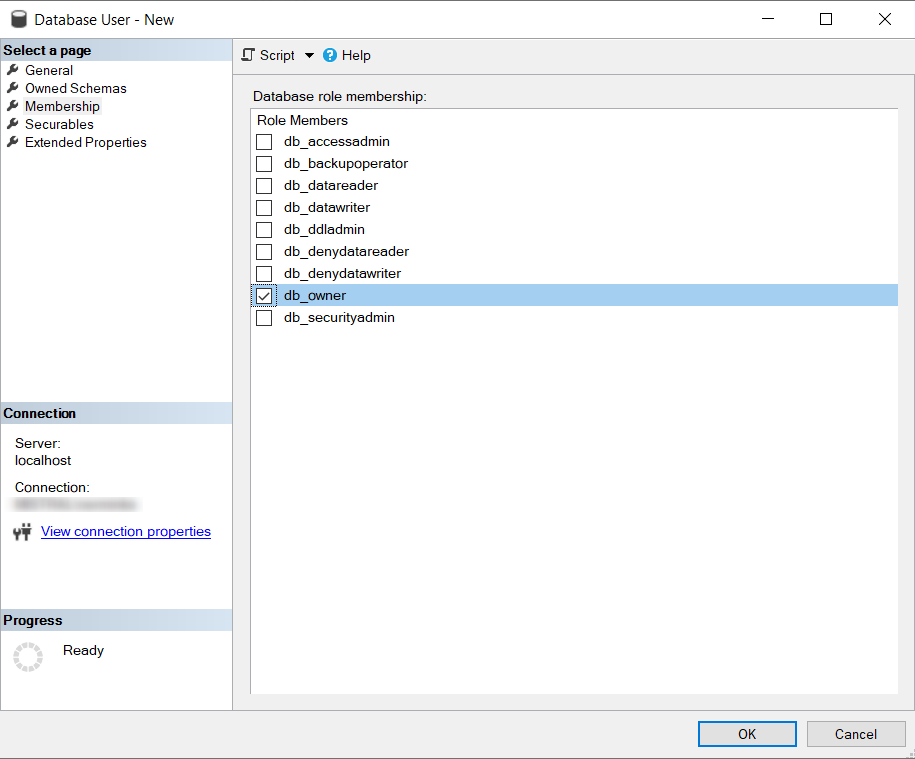
Also, make sure the user has DbOwner role:
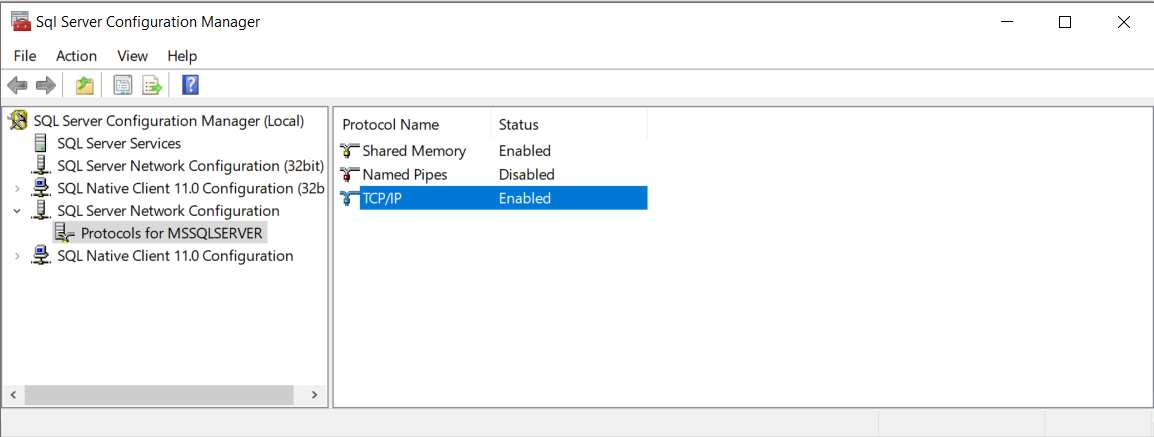
At this point, we are almost done with the database set up. But, before we can test everything from SQL management studio we need to enable TCP/IP network protocol in the configuration manager:
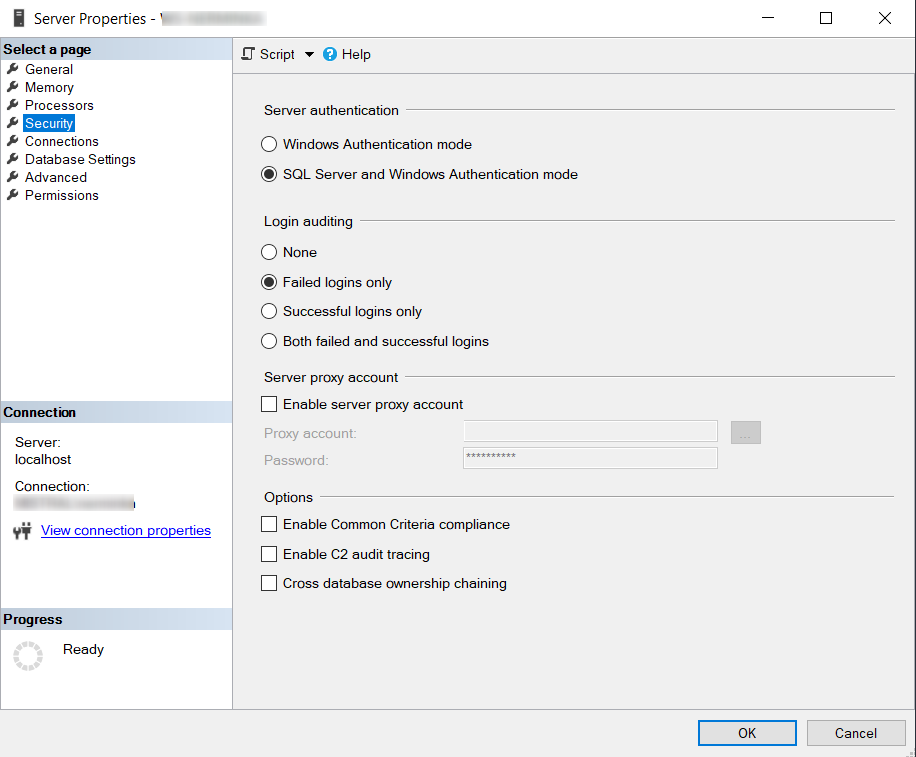
as well as the SQL server authentication mode:
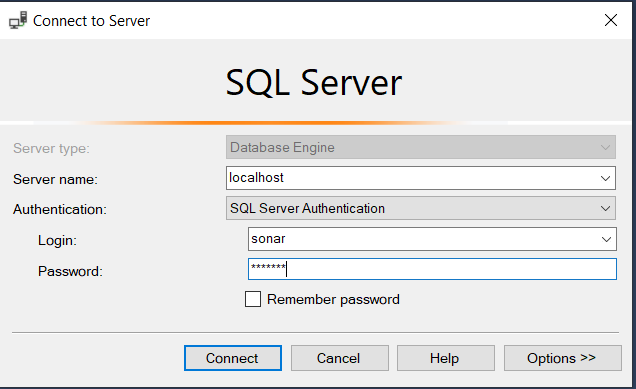
If you followed all steps, you should be able to login to SonarQube database:
SonarQube configuration
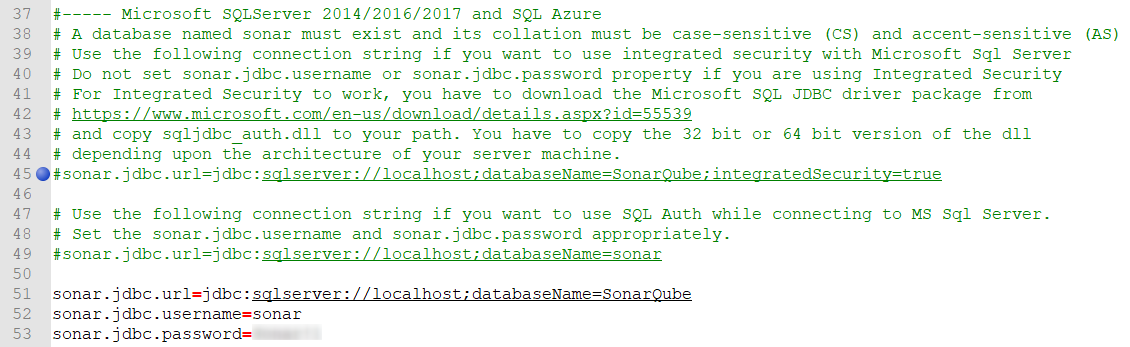
When we open sonar properties file in “conf” sub-folder, we ll find configuration sections for database, web server, SSO authentication, elastic search, logging and much more. In our case, we are only interested in database configuration so let s do the following:
After we run StartSonar.bat file, SonarQube should be up and running!
Project analysis
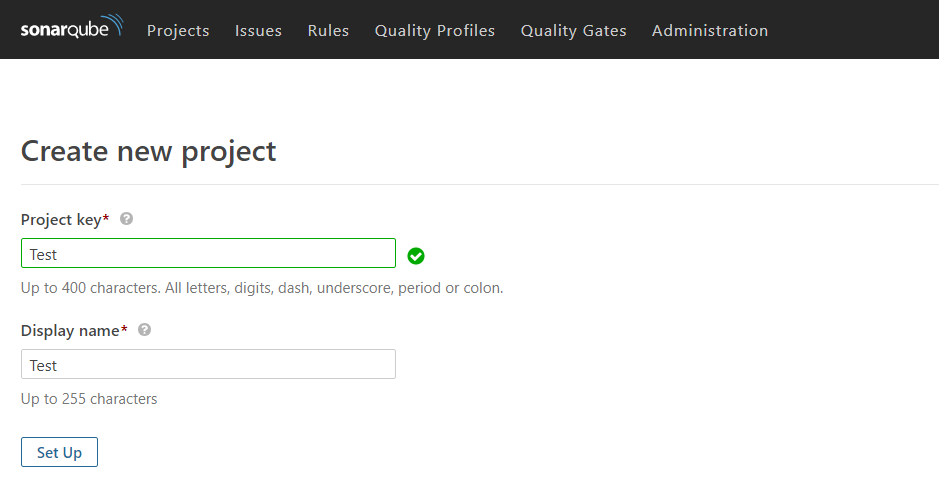
The first thing we need to do is to create a new project:
Then we need to generate a token that will be used for login purpose and also to download sonar scanner for the targeted framework:

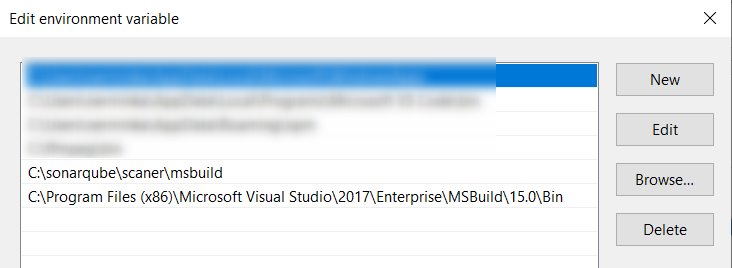
Now add its path as well as an ms-build path to the environment path variable:
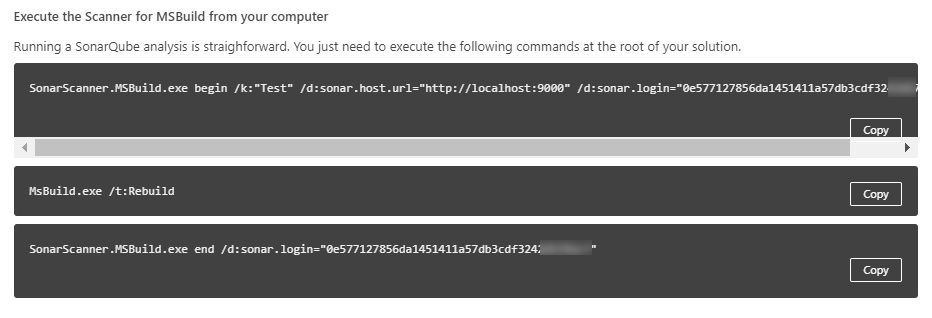
The only thing that s left to do now is to run given commands, one after another, from the root level of your project:
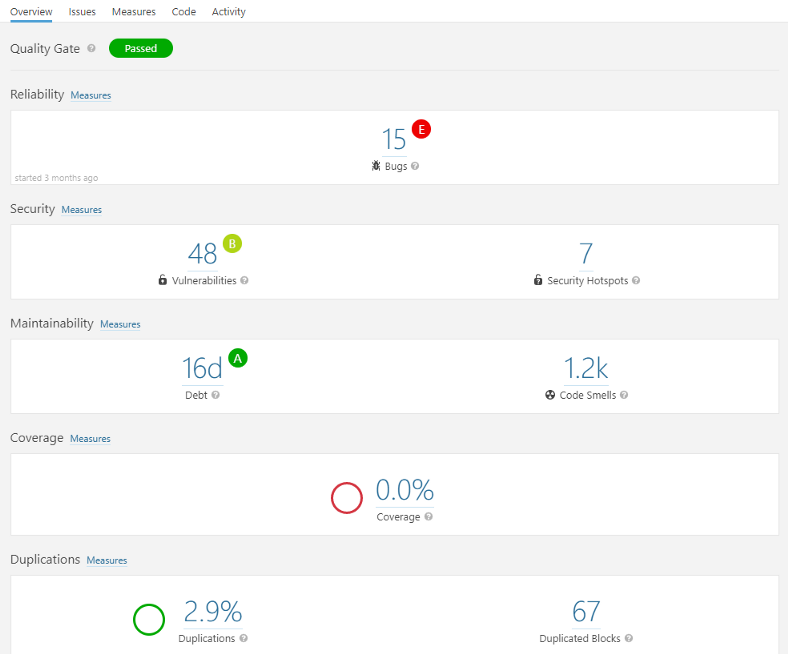
That s it! Wait for a few minutes and the results will show up in the web portal. Just don t be surprised if you get something like this 🙂
Conclusion
If you don t have static code analyzers already configured as a part of your CD/CI pipeline, please do it because you ll definitely write cleaner, more maintainable and less bug-prone code.
If you have, then you can still configure it on your local machine and run it whenever you want and on every piece of code that you write.
Happy coding!