Although I wrote the following blog a while ago, I decided to re-publish it since the topic is still of interest to many.
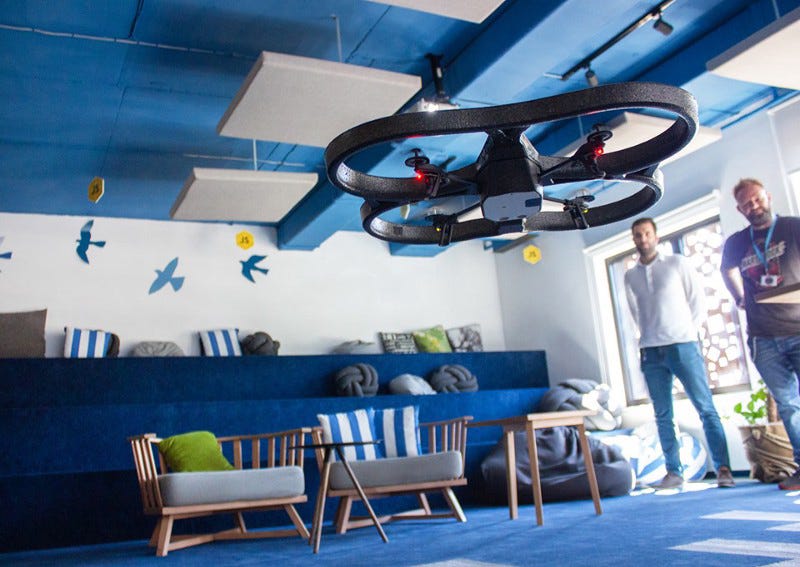
It seems everywhere you look these days, you find drones flying around. A few years ago, in the newspapers, information about drones most commonly appeared in the form of the secret military operations, but the air surrounding drones has changed quite a bit in the past few years.
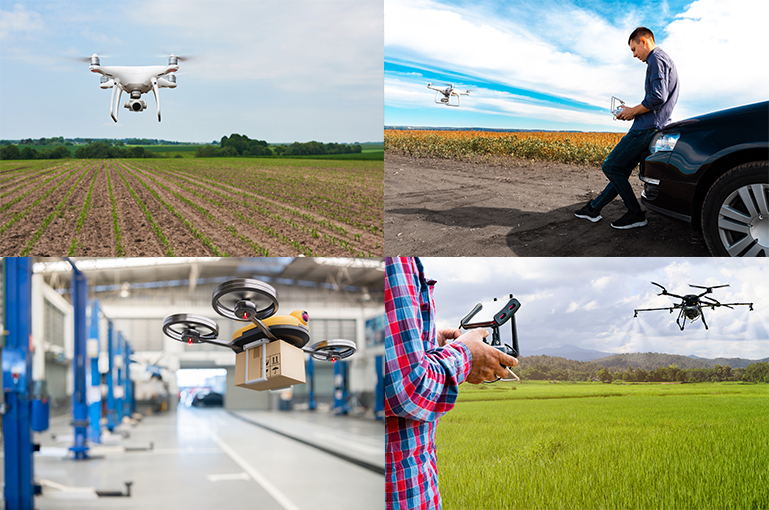
With their growing presence in the media, their potential is getting even more recognition. Today, drones are used for shooting commercials, professional film making, capturing live events, delivery or simply recreational.
The most common type of drones today?
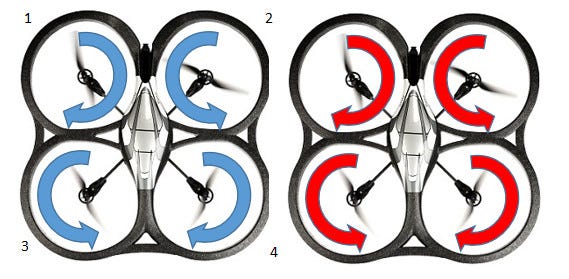
One of the most popular types of a drone is a quad-copter. A quad-copter is a multi-rotor helicopter that is lifted and propelled by four rotors. It generally uses two pairs of identical fixed pitched propellers; two clockwise (CW) and two counterclockwise (CCW). They use independent variation of the speed of each rotor to achieve control. By changing the speed of each rotor it is possible to specifically generate a desired total thrust and move the drone around.
So, how this works?
Increase and Decrease altitude – In order for the quad-copter to gain altitude, all four of the motors must increase the speed of rotation simultaneously. Otherwise, to descend down, all four of the motors must decrease the speed of its rotation simultaneously.
Moving Forward and Backward – How do you get the drone into this position? You could increase the rotation speed of rotors 3 and 4 (the rear ones) and decrease the speed of rotors 1 and 2.
Rotation – The rotation speed of diametrically opposing pairs of motors is increased or decreased, varying the torque in the direction of rotation of that pair causing the quad-copter to rotate in the direction of the increased torque.
Parrot AR Drone 2.0
For this project, I used the AR Drone 2.0 quad-copter made by the French company Parrot. Although the drone is manufactured a few years ago, it is still an affordable and surprisingly capable quad-copter. The drone doesn t have a remote controller. It s controlled by a smartphone or tablet using the official app for android devices that can be downloaded on the Google Play Store.
The best thing about this drone is the open client protocol. In other words, we can build our own apps on different platforms, and this is exactly what we are looking for!
Before we start with development, here are some drone technical details:
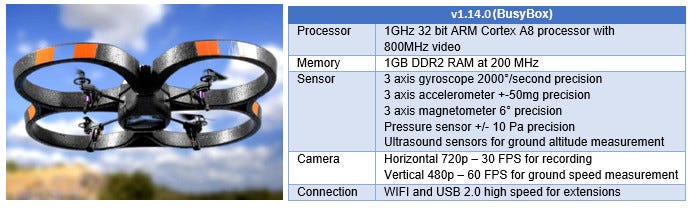
The drone is equipped with a front camera for video recording and a bottom camera for ground measurement. The pressure sensor allows the drone to know its height regardless of the ultrasound performance (according to the official drone development documentation, after 6 meters, the ultrasound can t measure the height).
Also, I need to mention that in the official AR Drone 2.0 documentation, you will find terms like pitch, roll, and yaw. They simply represent drone movements.
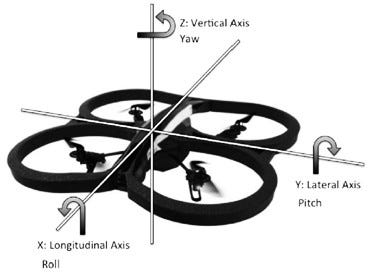
Adjusting the pitch angle means moving the drone forward or backward. Adjusting the roll angle will move a drone left or right, and adjusting the yaw angle will rotate drone left or right.
While working on this project, I found a lot of interesting facts about the drone specifications, operating system and sensors and I could probably write a few more pages on the topic. But by now we are already familiar with basic quad-copter concepts and ready for drone programming crash course.
If you re planning to do heavy development and you re interested in some of the low-level API s, please read the official Parrot AR Drone 2.0 SDK documentation.
Now, let s write some code!
Programming AR Drone 2.0 using Node.js and JavaScript
First, you will need to install node.js. Go to the following link and install the latest node.js for your platform. After node.js is installed, you can create a simple “hello ar-drone project”.
- Create a new folder and call it ar-drone-project
- Open a command prompt and create package.json file with npm init command
npm init- After this, install ar-drone library created by Felix Geisend├Ârfer
npm install ar-drone- Create the JavaScript file hello-ar-drone.js and put the following code inside
var arDrone = require('ar-drone');
var client  = arDrone.createClient();

client.takeoff();

client
    .after(5000, function() {
        this.clockwise(0.5);
    })
    .after(3000, function() {
        this.stop();
        this.land();
    });
The drone is ready to take off and fly!
Programming AR Drone 2.0 using Node.js and JavaScript
First, you will need to install node.js. Go to the following link and install the latest node.js for your platform. After node.js is installed, you can create a simple “hello ar-drone project”.
- Create a new folder and call it ar-drone-project
- Open a command prompt and create package.json file with npm init command
npm init
- After this, install ar-drone library created by Felix Geisend├Ârfer
npm install ar-drone
- Create the JavaScript file hello-ar-drone.js and put the following code inside
var arDrone = require('ar-drone');
var client  = arDrone.createClient();

client.takeoff();

client
    .after(5000, function() {
        this.clockwise(0.5);
    })
    .after(3000, function() {
        this.stop();
        this.land();
    });
The drone is ready to take off and fly!

Warning! Before you press enter, make sure that you have enough space to take off (at least 4 square meters) and double-check your code or you could seriously crash into something (YIKES).
Controlling the drone
Moving the drone left/right and up/down is very easy using these provided API methods:
client.left(speed)

client.right(speed)

client.front(speed)

client.back(speed)
Rotate it clockwise (CW) and counterclockwise (CCW):
client.clockwise(speed)

client.counterClockwise(speed)
Speed parameter is defined with 0 1 range:
client.right(0.5)You can even control drone led lights. Available animation:
['blinkGreenRed', 'blinkGreen', 'blinkRed', 'blinkOrange', 'snakeGreenRed',
'fire', 'standard', 'red', 'green', 'redSnake', 'blank', 'rightMissile',
'leftMissile', 'doubleMissile', 'frontLeftGreenOthersRed',
'frontRightGreenOthersRed', 'rearRightGreenOthersRed',
'rearLeftGreenOthersRed', 'leftGreenRightRed', 'leftRedRightGreen',
'blinkStandard']
Example:
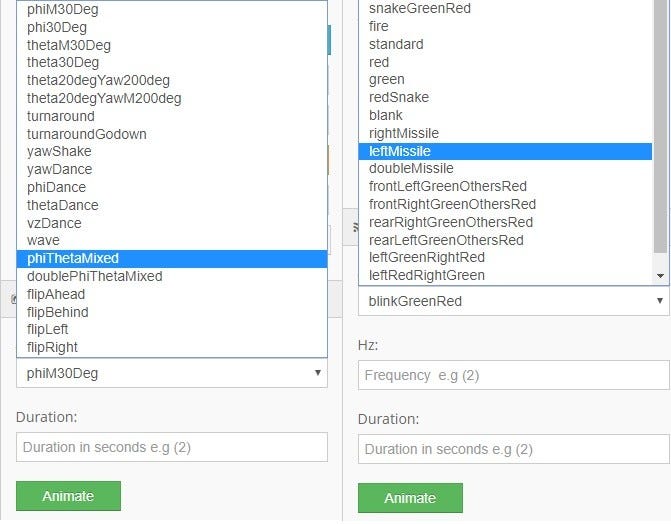
client.animateLeds('leftGreenRightRed', 5, 2)or perform some cool drone animations. Available drone animations:
['phiM30Deg', 'phi30Deg', 'thetaM30Deg', 'theta30Deg', 'theta20degYaw200deg',
'theta20degYawM200deg', 'turnaround', 'turnaroundGodown', 'yawShake',
'yawDance', 'phiDance', 'thetaDance', 'vzDance', 'wave', 'phiThetaMixed',
'doublePhiThetaMixed', 'flipAhead', 'flipBehind', 'flipLeft', 'flipRight']
Example:
client.animate('flipBehind', 1000);Streaming PNG images in a browser
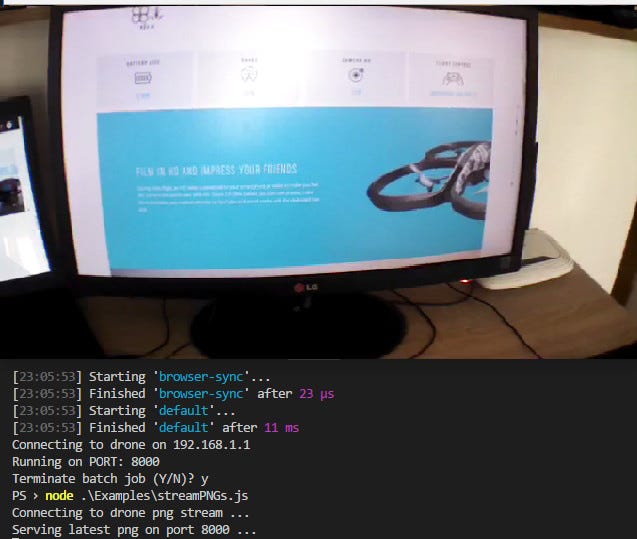
With just a few lines of code, images from the drone camera can be streamed in a web browser:
Example:
var arDrone = require('ar-drone');
var http    = require('http');

console.log('Connecting to drone video stream ...');

// Create client
var client = arDrone.createClient();

// Get PNG stream
var pngStream = client.getPngStream();

var lastPng;
pngStream
    .on('error', function(error){
        console.log("Error occurred: " + error);
    })
    .on('data', function(pngBuffer) {
        lastPng = pngBuffer;
    });

var server = http.createServer(function(req, res) {
    if (lastPng) {
        // Declare content type, in this case we want image/png
        res.writeHead(200, {'Content-Type': 'image/png'});
        res.end(lastPng);
    }else{
        res.writeHead(503);
        res.end('No stream data recieved.');
    }
});

server.listen(8000, function() {
    console.log('Serving latest png on port 8000 ...');
});
Drone configuration
You can configure drone name, min and max altitude, indoor or outdoor flight mode or which camera it will use:
Example:
client.config("control:altitude_max", 10);A lot of interesting parameters can be found in the official AR Drone SDK documentation.
Autonomous flight
Another interesting library that can be found is ardrone-autonomy. It s an autonomous flight library for the AR Drone, built on top of the node-ar-drone library. Instead of directly controlling the drone speed, you can use autonomy to plan and execute missions by describing the path, altitude, and orientation the drone must follow.
var autonomy = require('ardrone-autonomy');
var mission  = autonomy.createMission();

mission.takeoff()
       .zero()       // Sets the current state as the reference
       .altitude(1)  // Climb to altitude = 1 meter
       .forward(2)
       .right(2)
       .hover(1000)  // Hover in place for 1 second
       .land();

mission.run(function (err, result) {

    if (err) {
        console.trace("Error occurred: %s", err.message);
        mission.client().stop();
        mission.client().land();
    } else {
        console.log("Mission success!");
        process.exit(0);
    }
});
Again, if you decided to play with this library I advise you to give the drone some space.
AR Drone 2.0 Web App Project
So far we have enough knowledge to build our drone app, so let s do it!
Navigation
Using previously explained API s, I created a simple navigation panel:
Again, if you decided to play with this library I advise you to give the drone some space.
AR Drone 2.0 Web App Project
So far we have enough knowledge to build our drone app, so let s do it!
Navigation
Using previously explained API s, I created a simple navigation panel:

We can move the drone using buttons and adjusting speed and distance parameters. We have an option of constant movement until the stop button is pressed, or we can configure the desired distance and the drone will automatically stop and hover when the configured distance is reached.
“Override Distance” button will automatically stop the drone after 0.5 meters. It s a handy option because we don t want to crash into something while testing new features.
If we map keyboard keys to API methods, we will get an option to move the drone using a keyboard. As simple as that.
$(function() {
    var keyPressed = false;

    $(document).keydown(keydownListener)
               .keyup(keyupListener);

    function keydownListener(event) {

        var useKeyboardForNavigation = $("#cbx-use-keyboard").is(":checked");

        if (!keyPressed && useKeyboardForNavigation) {

            switch (event.which) {
                case 87: // w key
                    moveForward();
                    keyPressed = true;
                    break;
                case 83: // s key
                    moveBackward();
                    keyPressed = true;
                    break;
...
Also, we can move the drone around using some of the voice recognition API s. I used the Annyang library. Annyang is a tiny JavaScript library with no dependencies and weights only 2kb. The only requirement is an additional WiFi adapter because we need to have internet access, and the primary one is used for connection with the drone.
if (annyang) {

        // Commands mapings - command/function

        var commands =
        {"move forward": function() {
            moveForward();
        },
        "move backward": function() {
            moveBackward();
        },
        "move left": function() {
            moveLeft();
        }
...
Drone animations
A drone can perform a lot of preprogrammed animations (flips & led animations):
Drone configuration
AR Drone 2.0 has many parameters that can be configured. I added a few, but if we take a look at the official SDK documentation we ll find more than 30!

Navigation data
Information about the drone (status, position, speed, engine rotation speed, etc.), called navdata, is sent by the drone to its client on UDP port 5554. These navdata include tags detection information that can be used to create augmented reality games. They are sent approximately 15 times per second in a demo mode, and 200 times per second in a full (debug) mode.
Also, I need to mention that most of these parameter groups are subscription-based, so you are in full control of what your drone will emit.
Check out some of the categories of the most useful parameters:
var arDroneConstants = require("ar-drone/lib/constants");

var droneConfiguration = function(drone) {

    var navdata_options = arDroneConstants.options.DEMO |
    arDroneConstants.options.VISION_DETECT |
    arDroneConstants.options.MAGNETO |
    arDroneConstants.options.ALTITUDE |
    arDroneConstants.options.WIFI;

    drone.config("general:navdata_demo", true);
    drone.config("general:navdata_options", navdata_options);
};

module.exports = droneConfiguration;
Drone cockpit

How did I implement the drone cockpit?
Simple, using web sockets!
Server-side:
var droneClient = require("./../Drone/droneClient");

function startNavdataStream(server) {

    var io = require("socket.io").listen(server);
    io.sockets.on("connection", function(socket) {
        droneClient.on("navdata", function(data) {
            socket.emit("navdata", data);
        });
    });
}

module.exports = { startNavdataStream };
Client-side:
$(function() {

// Get Drone Navdata
var socket = io.connect("http://localhost:8000");

socket.on("navdata", function(navdata) {


if (navdata == null) {
    return;
}
var navdataBatteryPercentage = navdata.demo.batteryPercentage;

...

// Gyroscope
$("#lbl-pitch").text(Math.round(navdata.demo.rotation.x * 100) / 100);

...
That s it for now!
In the next blog, we ll talk about drone s OS, camera, azure cognitive services, how to telnet to the drone from web browser, etc. Until then, please use the comment section for any questions. Cheers!