I am probably not the only software developer who Googles everything, even the things I know how to implement, in order to check if anyone has some useful tips and tricks on the topic.
On that note, some time ago, I needed to implement localization in a Vue app I am currently working on. Even though I had a plan on how to achieve this, I decided to take a dive into Google search and see if someone has come up with a trick for it that I hadn t thought of.
I was surprised to see there were no results on how to implement this by just using Vue and Vuex. At least not on the first page of the search results, and we all know if it isn t on the first page you won t find it. All the results pointed to libraries you could use to implement this.
Rather than using libraries I decided to take the challenge and implement this on my own,because I thought “There is no way that this should be complicated with Vue s perfection and simplicity”.
This blog is exactly about that: how to implement localization in your Vue app. Maybe someone will stumble upon this if they google this topic as I did.
So let s take a look at what we want to build.
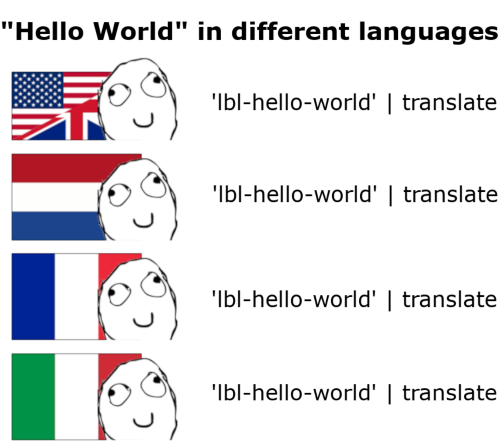
Our goal is to enable the user to chose a desired language for the page, and as the user changes the language all strings we marked for translation should translate to the selected language. In this case, I went for radio buttons but it can be a dropdown on your navbar or something similar.
The general idea for the implementation is simple:
- store the selected language in our Vuex store
- create a custom Vue filter (| translate) which will take our strings and return them translated in the desired language
- create a service which will be used by the filter to access our localization files and decide which translation to return based on the currently selected language in the store
So let s take each of these steps to implement our localization.
1. Create a project
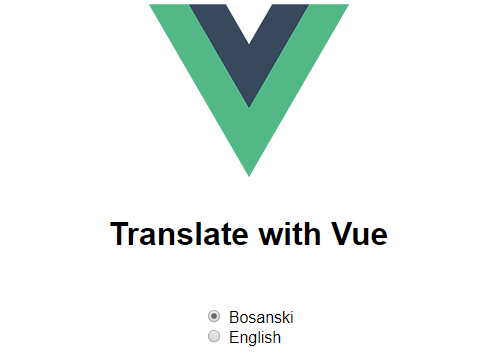
The first thing we obviously need to have is a Vue project. For the purpose of this demo I used this template which is a simple template including webpack and vue-loader suited for prototyping. Just follow the instructions for its usage and you are good to go. I deleted most of the code in App.vue that comes with this template, I only left the Vue logo and added the title <h1>Translate with Vue</h1>to it.
In case you have your own project you want to add localization to, feel free to use your existing project.
2. Create a language selector component
Let s now build the component which will handle the actual language change, which means it needs to take user input and store the user s selected language in our store.
The first thing we will do is add a “component” folder under our “src” folder and create a Single File Vue component called LanguageSelector.vue.
This component needs to know about the available languages we will support in order to iterate the list and create a radio button for each supported language. So let s create this list for our component.
Create a folder called “localization” under the “assets” folder. This folder will hold all relevant data for our localization: the actual resource files with the translated strings as well as the before mentioned list of available languages. This will enable us to easily add new languages in case that is ever required of us.
In the localization folder create the file languages.js and create an array of the languages you want to support.
I formatted my languages as objects, each with an id, name, and label, but it depends on what kind of a language selector you are going for, feel free to do this as you see fit. This is what worked best for me.
This is the file you will use to add all new app languages in the future. This way we don t need to go to our component and add each new language because we will simply make our component iterate through this list to show available languages.
Our LanguageSelector component will look as follows:
Before adding Vuex into the equation let s use this component in our App.vue.
Our app looks as follows so far:
3. Setup Vuex store
Our selected language is currently only known to our language selector component. In order for other components in our app to be aware of which language is currently selected and therefore which language needs to be used for translation we need to make our language selector component pass the information to our store. This is a great example for when Vuex can really shine and simplify the work for you.
Install Vuex by running npm install vuex - save .
I usually separate the store into a folder for holding all store modules. We will only have one global store here, but in a complete project this might be placed into a store module on its own.
For a clearer structure of the project let s create our store in a separate folder. Add a folder called “store” in the “src” folder, and create a js file called “index.js”. Our state needs to hold the currently selected language, to which I assigned the ID of the first language from our available languages list. We will need one mutation which will set the value of the current language based on the user s input from the language selector.
Finally, we need one getter which will be used by our filter to retrieve the value of the selected language in order to use it for translation. So the index.js file in our store will look as follows:
Don t forget to add the store to your app in your main.js file.
import Vue from 'vue';
import App from './App.vue';
import store from './store';

new Vue({
 el: '#app',
 store,
 render: h => h(App)
})
Our language selector component will now need a slight modification in order to work with the store. Instead of using a variable in the component itself for the v-model of our radio button, we will separate our “selectedLanguage” property into a getter and a setter which uses the store s mutation, and getter to set and retrieve the value of the currently selected language. This yields in the following final code in our language selector component:
4. Create a Translate Service
We are now ready to go into the actual translation process. The translation will happen in our translate service which will have a method called “translate”. This method will always receive one parameter which represents the key of the string we need to translate. The translate service needs to know about the currently selected language in our store in order to look into the correct set of key-value pairs, where it will look for the passed in key and return the correct translation. So let s first create our dictionary and actual localization files in order for our service to have something to work with.
In the localization folder add a localization file for each language you are supporting. In my case those files will be “lang-bs.js” (for Bosnian translations) and “lang-en.js” (for English translations). Both these files will simply hold key-value pairs of strings and their translation into the language the file is corresponding to.
For demonstration purposes I added three translated strings to both files, which I will later use to demonstrate how the solution works, but here is where you add all your future translations. Here are my localization files:
One last thing we need to do in order for our service to be able to read the correct translation is to combine these two localization objects into one dictionary. Add an “index.js” file in your localization folder, and import your localization files into it. Combine them in one object, where the key is the ID of the language the localization is responding to and the value is the actual localization object. This looks as follows:
Now let s write the actual service. Create a “services” folder under “src” and create the file “translate.service.js” in it. This is where we will implement our translate service. First, we need to import our store in order to make the service aware of the selected language, and our previously created dictionary.
The translate method will retrieve the current language from our store and use the retrieved value to access the localization file identified by the selected language value in our dictionary and then return the correct key in that localization file.
Our service is now ready to be used by the translate filter.
5. Create a Translate Filter
Creating the translate filter is now pretty straightforward and easy as it will make use of our translate service.
First let s add a “filters” folder under “src” and create the file translate.filter.js. Create a Vue filter in it which simply passes the retrieved key to our translate service which in return translates the key into the correct languages. The filter simply displays this on our UI.
Import the filter in your main.js file to make it globally available by adding import ./filters/translate.filter ;
We are now set to use our translate filter and make our app truly international.
6. Use the Translate Filter
I have added three examples for the usage of our filter in my App.vue folder.
<h2>{{ 'lbl-welcome' | translate}}</h2>

<button>{{'lbl-confirm' | translate}}</button>

<input type="button" :value="'lbl-cancel' | translate">
As you can see the implementation is now simply used as a Vue filter to indicate which strings need to be translated. They can be used directly in your html tags through text interpolation or in element attribute bindings as demonstrated above.
Now when we choose a different language in our app all strings will automatically be translated to the newly selected language:


As you can see the solution is very straightforward and simple, thanks to Vuex and Vue filters.
It s easy to expand with more languages and unlimited number of strings in your localization files.
The complete code of this example can be found here.
I hope you enjoyed this little demo. It is not the most complicated piece of code out there (which is good, given the simple problem we were trying to solve), but it is something commonly needed in apps, so putting my idea for a solution out there seemed like the right thing to do.
If you have any questions or suggestions feel free to contact me at dalilaav@maestralsolutions.com