
This is a two-part guide for designing flexible and cross-platform API using ASP.NET Core. You can read Part 1 here.
In this part, we will explain how to configure API middleware and other services. Following this, we will explain how to test everything using Swagger.
Middleware configuration
ASP.NET Core applications start inside of Program.cs and after initial configuration is completed, Startup.cs is initiated. We use ConfigureServices method inside of Startup class to define services that our application will use. All third party libraries configuration, as well as other service initialization, will be placed here.
public void ConfigureServices(IServiceCollection services)
{
   // MVC + fluent validation initialization
   services.AddMvc()
          .SetCompatibilityVersion(CompatibilityVersion.Version_2_1)
          .AddFluentValidation();
// Dependency injection - fluent validation
   services.AddSingleton<IValidator<UserRegisterDto>,
                                     AddUserDtoValidator>();
   // Override Modelstate behavior
   // Aggregate valdiation errors
   services.Configure<ApiBehaviorOptions>(options =>{
options.InvalidModelStateResponseFactory = (context) =>
   {
      var errors = context.ModelState.Values.SelectMany(x =>
                x.Errors.Select(p => p.ErrorMessage)).ToList();

      var result = new
      {
         Code = "400", // BadRequest error code
         Message = "Validation errors",
         Errors = errors
      };
      return new BadRequestObjectResult(result);
   };});
// SQL provider configuration
   services.AddDbContext<DataContext>(x => x.UseSqlite
   (Configuration.GetConnectionString("DefaultConnection")));

   // Dependency injection - repositories
   services.AddScoped<IAuthentificationRepository,
                      AuthRepository>();
services.AddScoped<IBookRepository, BooksRepository>();
// JWT token authentification set up
   services.AddAuthentication
                          (JwtBearerDefaults.AuthenticationScheme)
                          .AddJwtBearer(options =>
   {
      var token  = Encoding.ASCII.GetBytes(
      Configuration.GetSection("AppSettings:Token").Value);
      options.TokenValidationParameters = new
      TokenValidationParameters
      {
         ValidateIssuerSigningKey = true,
         IssuerSigningKey = new SymmetricSecurityKey(token),
         ValidateIssuer = false,
         ValidateAudience = false
      };
    });
// AutoMapper initialization
   services.AddAutoMapper();}
// Register the Swagger generator, defining 1 or more Swagger
   documents
   services.AddSwaggerGen(c => {
           c.SwaggerDoc("v1", new Info
           {
              Title = "WebApp.API",
              Version = "v1"
           });
c.AddSecurityDefinition("Bearer", new ApiKeyScheme
   {
      In = "header",
      Description = "Please enter JWT with Bearer into field",
      Name = "Authorization",
      Type = "apiKey"
   });

   c.AddSecurityRequirement(new Dictionary<string,
   IEnumerable<string>>
   {
      { "Bearer", Enumerable.Empty<string>() }
   });
   });

   services.AddCors();
}
Next, modify Configure method. This is the place where we typically use IApplicationBuilder to set up our middleware.
public void Configure(IApplicationBuilder app,
                      IHostingEnvironment env)
{
   if (env.IsDevelopment())
   {
      app.UseDeveloperExceptionPage();
   }
   else
   {
      // Global exception handler
      app.UseExceptionHandler(builder =>
     {
        builder.Run(async context =>
        {
           context.Response.StatusCode =
           (int)HttpStatusCode.InternalServerError;
           context.Response.ContentType = "application/json";
╦ø          var contextFeature =
               context.Features.Get<IExceptionHandlerFeature>();
if (contextFeature != null)
           {
              // Log error
              // Write response
              await context.Response
                    .WriteAsync(contextFeature.Error.Message);
           }});
       });
app.UseHttps();}
     app.UseHttpsRedirection();
     app.UseAuthentication();
     app.UseSwagger();

     // Enable middleware to serve swagger-ui (HTML, JS, CSS, etc.),
     // specifying the Swagger JSON endpoint.
app.UseSwaggerUI(c =>
     {
         c.SwaggerEndpoint("/swagger/v1/swagger.json", "My API V1");
     });
app.UseMvc();
}
We configured authentication and Swagger. In addition to that, we created a global exception handler to make API actions more readable and the error handling process more maintainable.
Test API
Once we have created API and set up all the necessary tools, the only thing left is to test it.
Registration
Let s create a POST request in order to set up a new User:
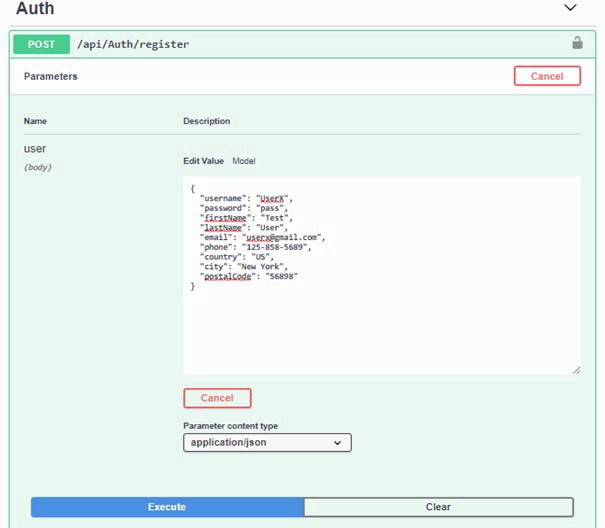
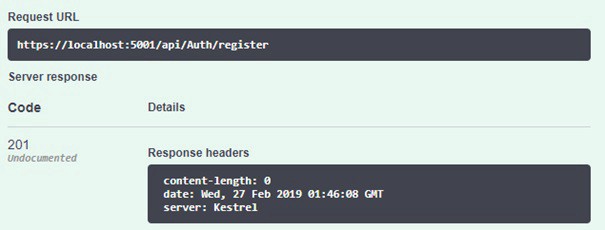
After the request has been submitted, we ll get 201 code and the user should be inserted into the database.
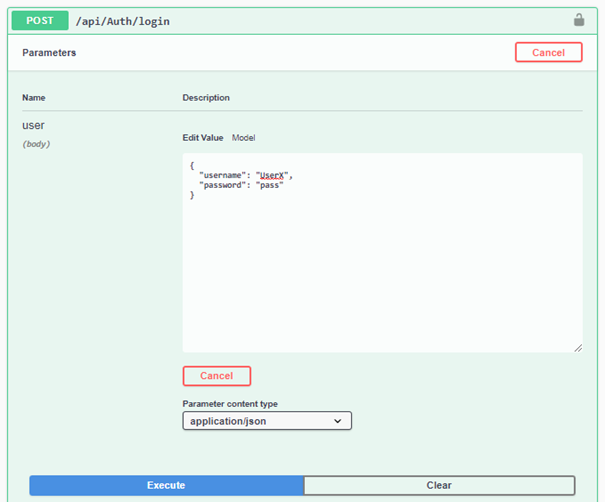
Authentication
In order to authenticate user, we need to send a valid username/password combination:
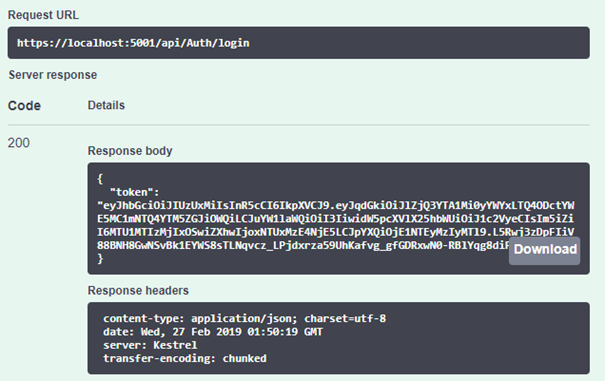
If the user is successfully authenticated, the response will contain JWT token:
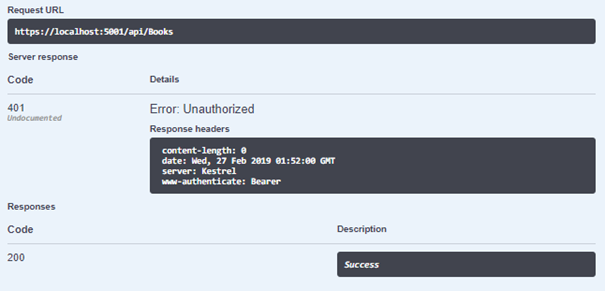
Retrieve data
Now when we try to access Books controller that requires an authorization, we ll receive 401 Unauthorized error code:
In order to pass authorization, we need to include Bearer token in our request. In order to do this with Swagger, we ll need some additional configuration in the Swagger generator:
// Register the Swagger generator, defining 1 or more Swagger documents
services.AddSwaggerGen(c =>
{
   ...
   c.AddSecurityDefinition("Bearer", new ApiKeyScheme
   {
      In = "header",
      Description = "Please enter JWT with Bearer into field",
      Name = "Authorization",
      Type = "apiKey"
   });

   c.AddSecurityRequirement(new Dictionary<string,
                            IEnumerable<string>>
   {
      { "Bearer", Enumerable.Empty<string>() }
   });
});
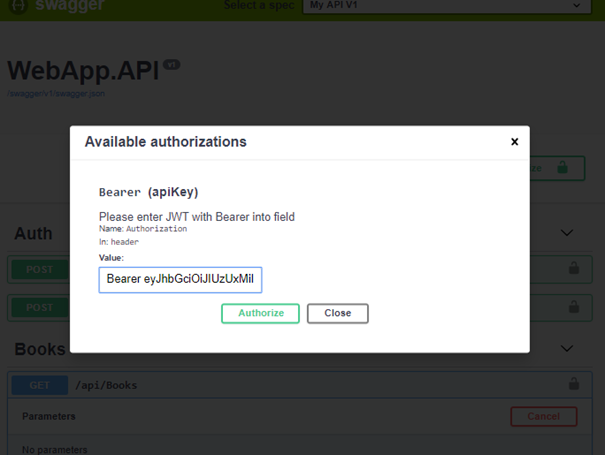
We should see an Authorize button in the upper right corner where we can enter authorization data:

Enter token that was previously retrieved with Login action:
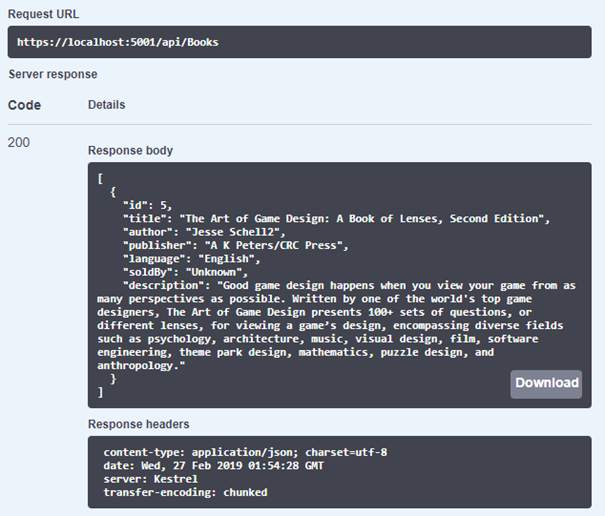
Now, when we submit the request, we should get a response with valid data. This means the user was successfully authorized.
Conclusion
We hope you ll find this two-part guide for designing a flexible and cross-platform API useful. In the end, I d like to point out that this is not a bullet-proof solution, and it might not cover all your needs for “Production ready API”, but it will definitely give you an idea how to start with building a flexible, extensible and maintainable API using ASP.NET Core.
This will give you a headstart and you ll get a basic overview of:
- Implementing authentification,
- Creating model validation,
- Repositories,
- Generic error handler
- Data mappings between ORM entities and DTO s,
- Developing and testing with Swagger,
- Implementing asynchronous data transfer.
That s it for now! Feel free to share any thoughts or questions you may have.